Start the SysInfo Photo Recovery Software on your system as an administrator.
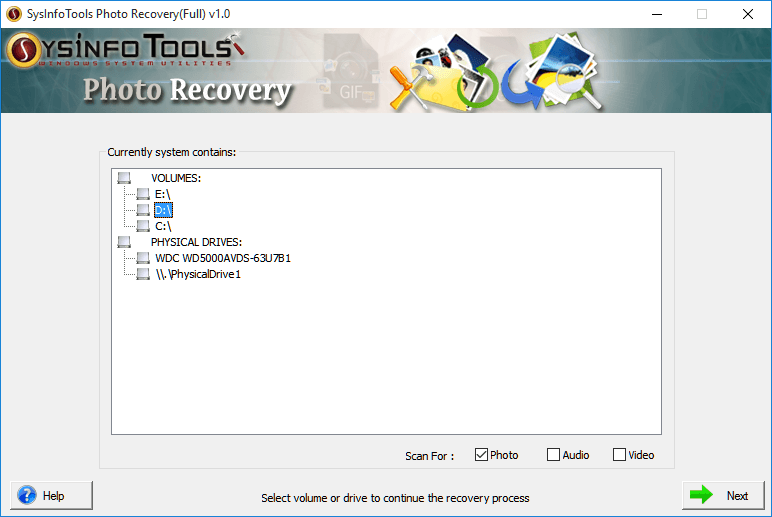
Select the Drive or Volume from which you want to recover the deleted or corrupted photos. Additionally, pick options like audio or video, if you want to recover it as well. Press Next to proceed.
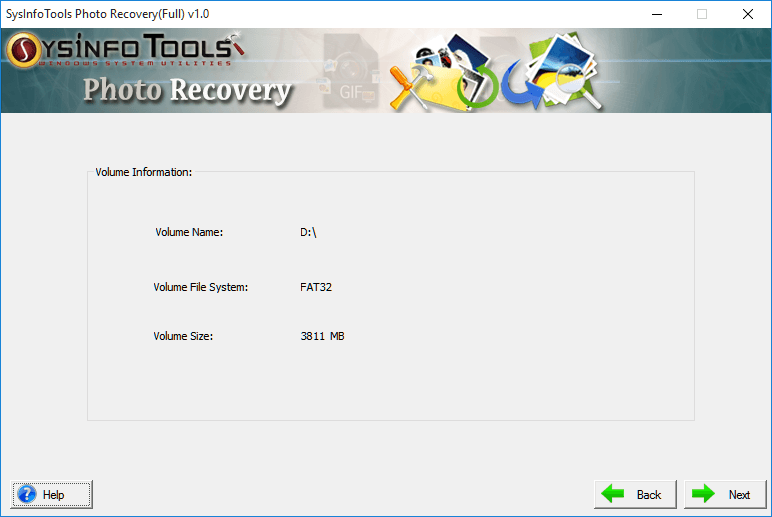
Here you can see the information on the selected drive volume.
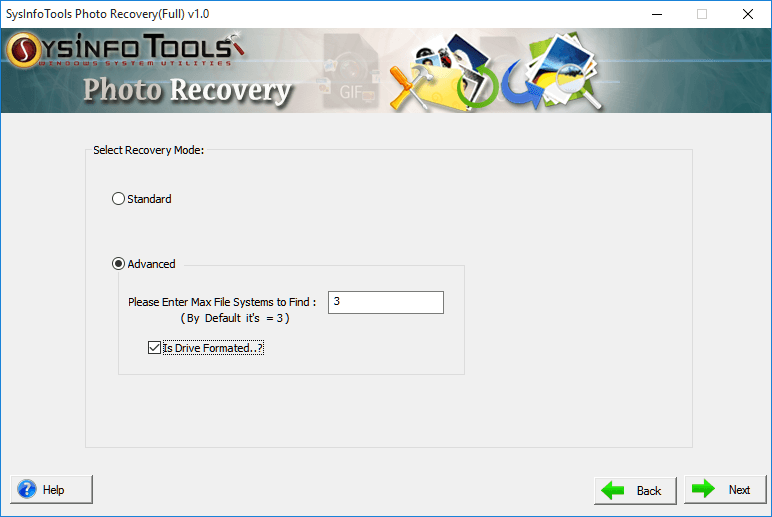
Select the Recovery Mode from the given two modes. If you are going for Advanced mode; you have an option to recover data if your drive is formatted.
Once you click on Next in the previous step; the software will parse the disk. It will take some to complete.
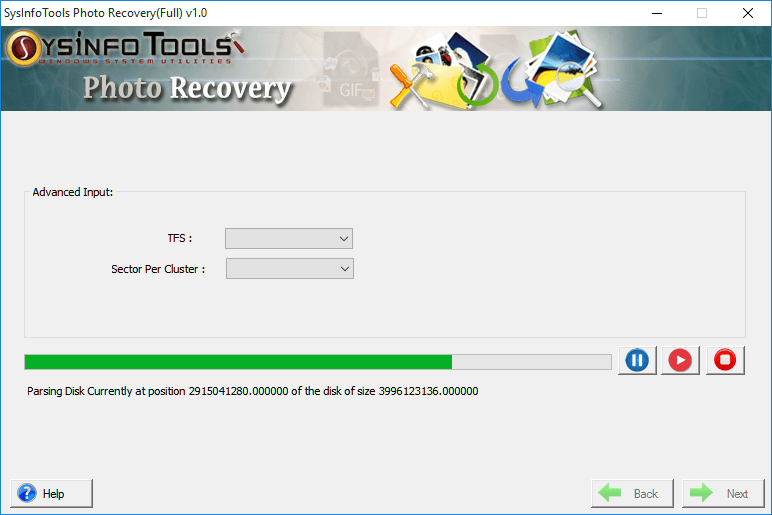
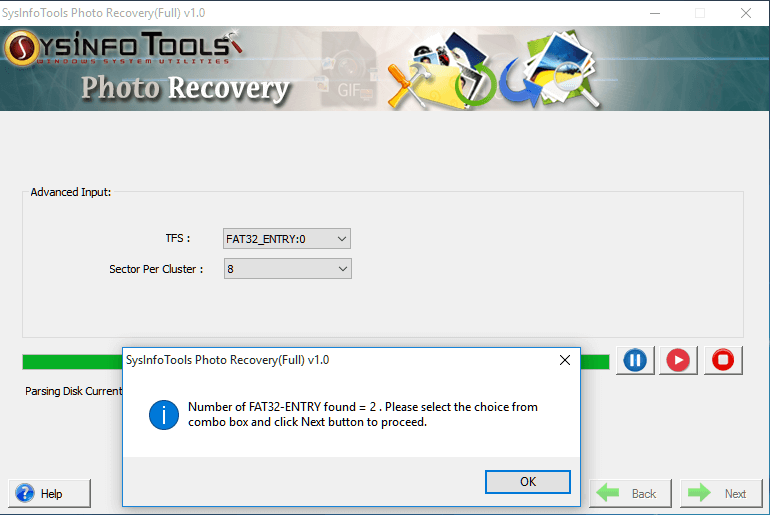
After the parsing process is completed, press OK to proceed. The software gives you two options: TFS and Sector per cluster as it automatically detects it. But you can also choose it according to your choice.
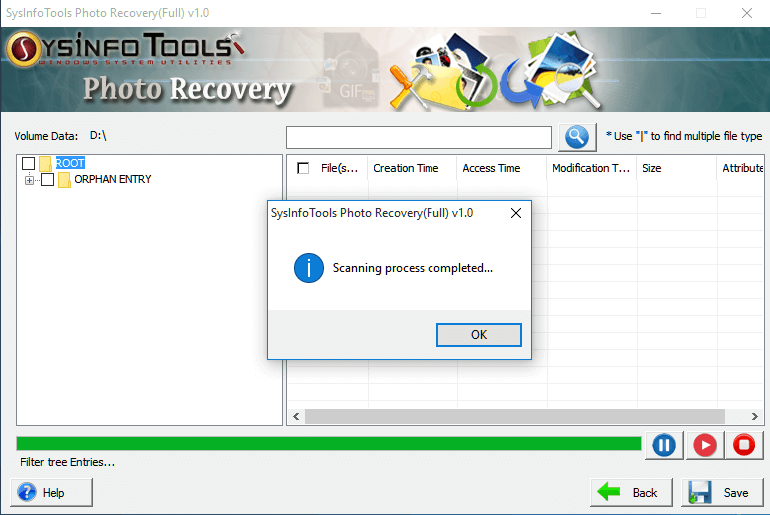
After parsing is completed with the selection, the application starts the scanning process to recover the deleted files from the selected drive. Once it completes the process click Ok.
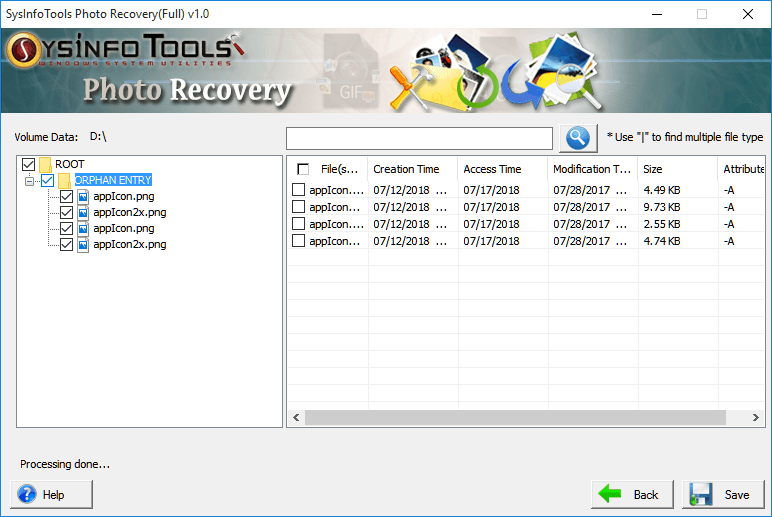
You can see your photos that were deleted earlier. Make the selection of the file to be recovered and click on the Save button.
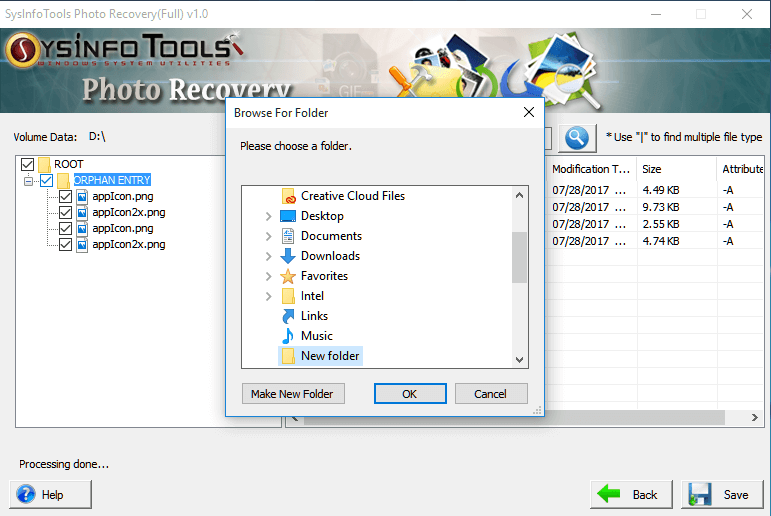
Choose the destination folder, to save your recovered photo(s). Click OK.
The saving process will take some time, which depends on the number of files and will save your photos at your defined location. Click OK.

