Download and install the SysInfo Volume and HDD Image Recovery Tool as an administrator.

Now, select the option either a Volume Image file or HDD Image and click on Browse. Click on Next.
Select the corrupted Image file from the browse and click on Open.

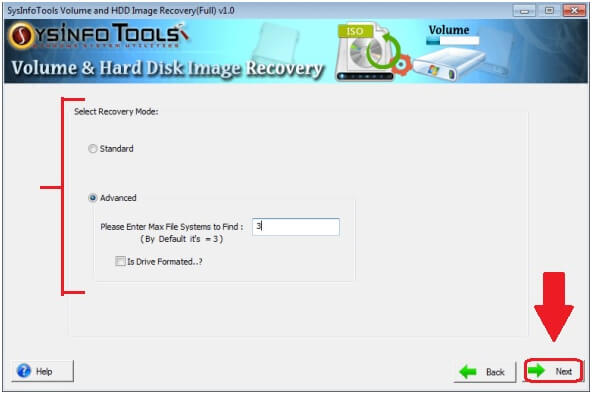
Choose the recovery mode between Advanced and Standard and click on Next after fulfilling the other Options.

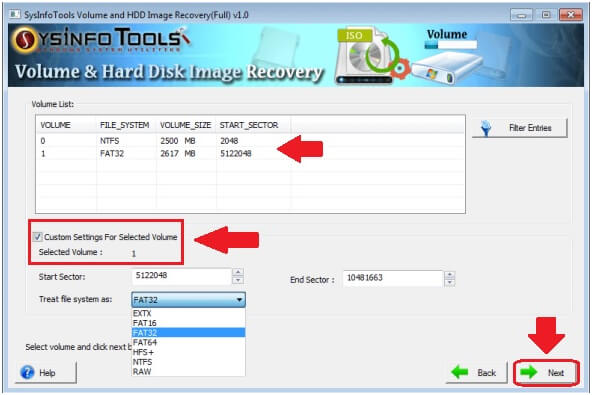
From the volume list, select the Volume to recover data. If you want to do Custom Settings then you can do that as well. Click on Next to move further.
The two recovery modes will appear on the screen, Advanced and Standard modes. Choose any one and Click on Next.
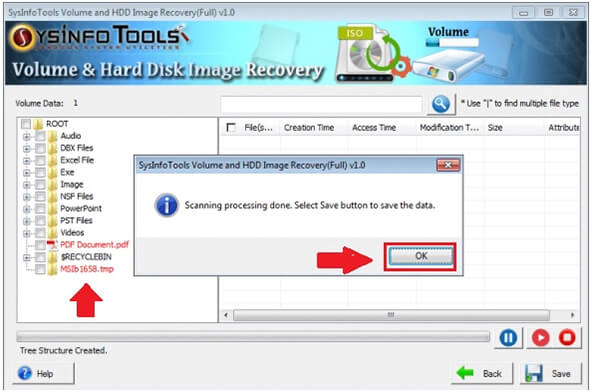
In a few minutes, the scanning process will be completed. The recovered data will be visible in a tree structure. Click on OK to go to the saving process.
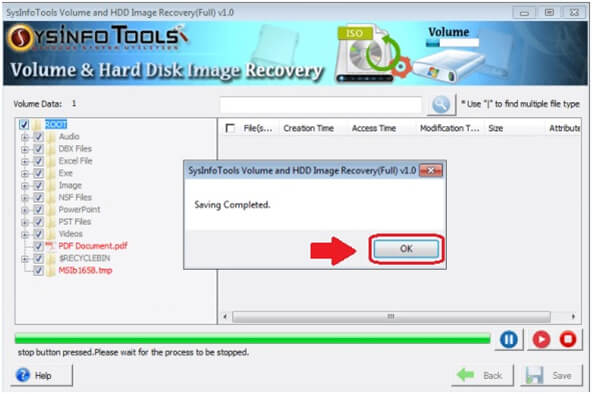
Select the recovered file you want to save. You can save them to your preferred location. Click on OK and then on Save.

A dialogue box will appear showing you the confirmation. Click on OK and finish the whole process.