Imagine having everything you need for work- emails, documents, spreadsheets, and calendars- all in one place. Sounds convenient, right? That’s exactly what Google Workspace offers! Logging in is your first step, and here is a guide to help you through it, step by step. Whether you’re new to Google Workspace or just need a refresher, this guide will make the login process easier. Let us see how to log in Google Workspace Account.
Here are the steps you need to perform for a complete functional Google Workspace:
Before proceeding with the backup or migration process, you need to create a Google Cloud Console project (if your source platform is G Suite). Here are the simple steps to create a project in Google Cloud Console:
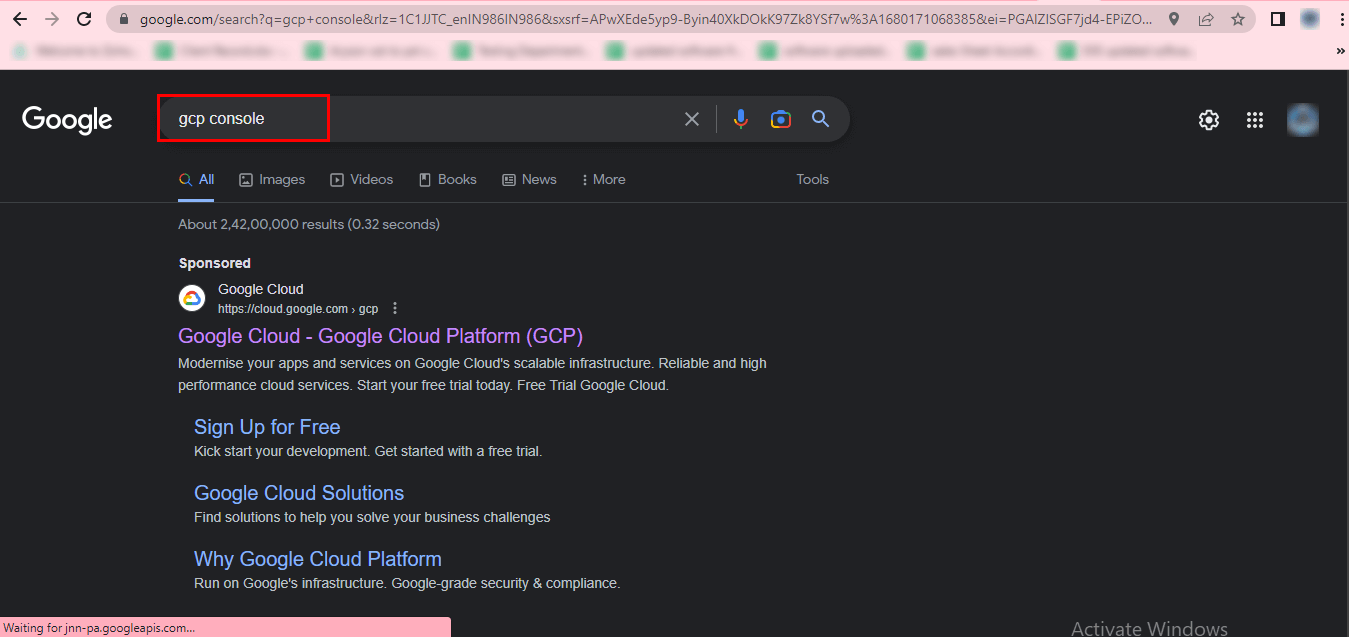
Step-1 Search for gcp console on Google and click on the first result, which should say Google Cloud - Google Cloud Platform (GCP).
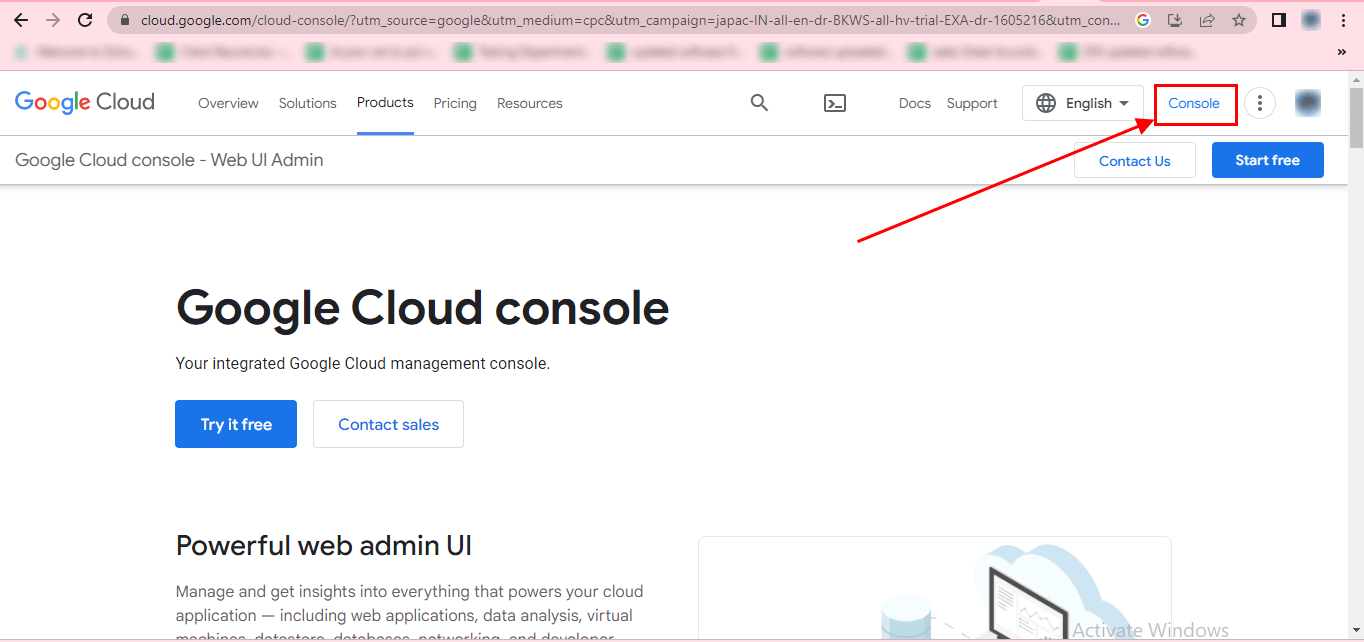
Step-2 Click on the Console button at the top-left corner.
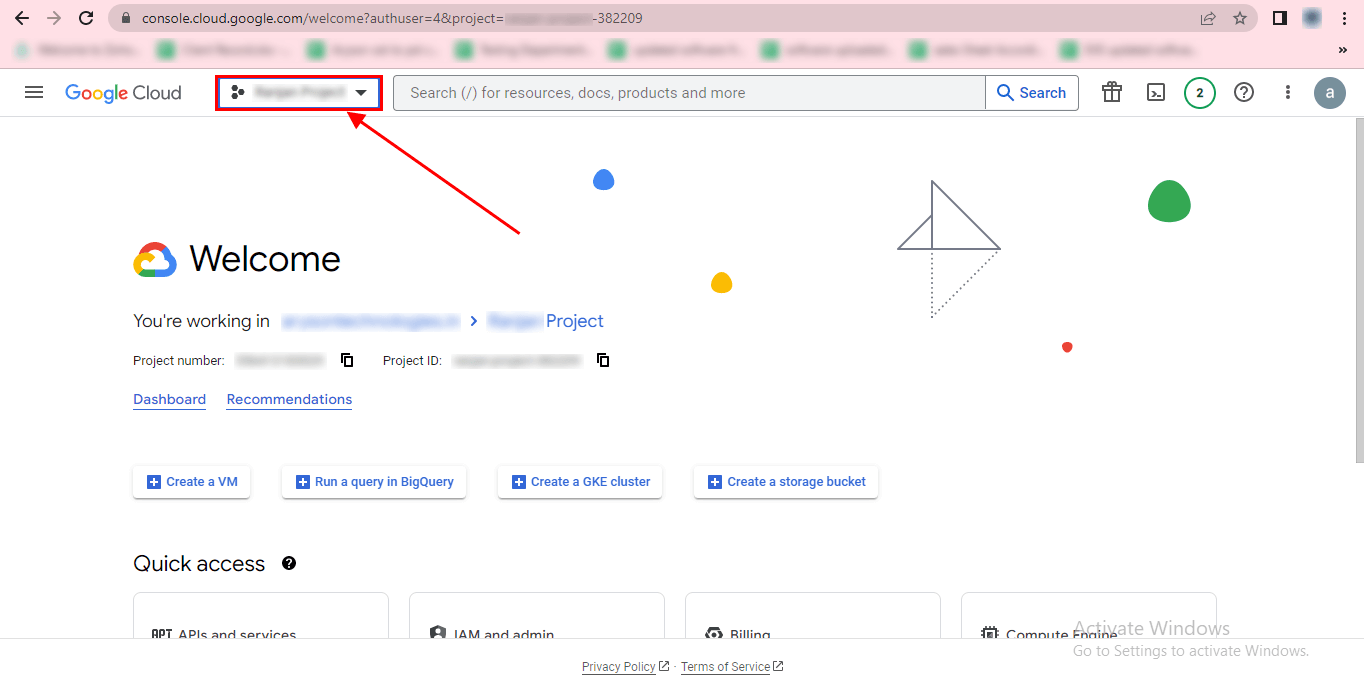
Step-3 Open an existing project or create a new one.
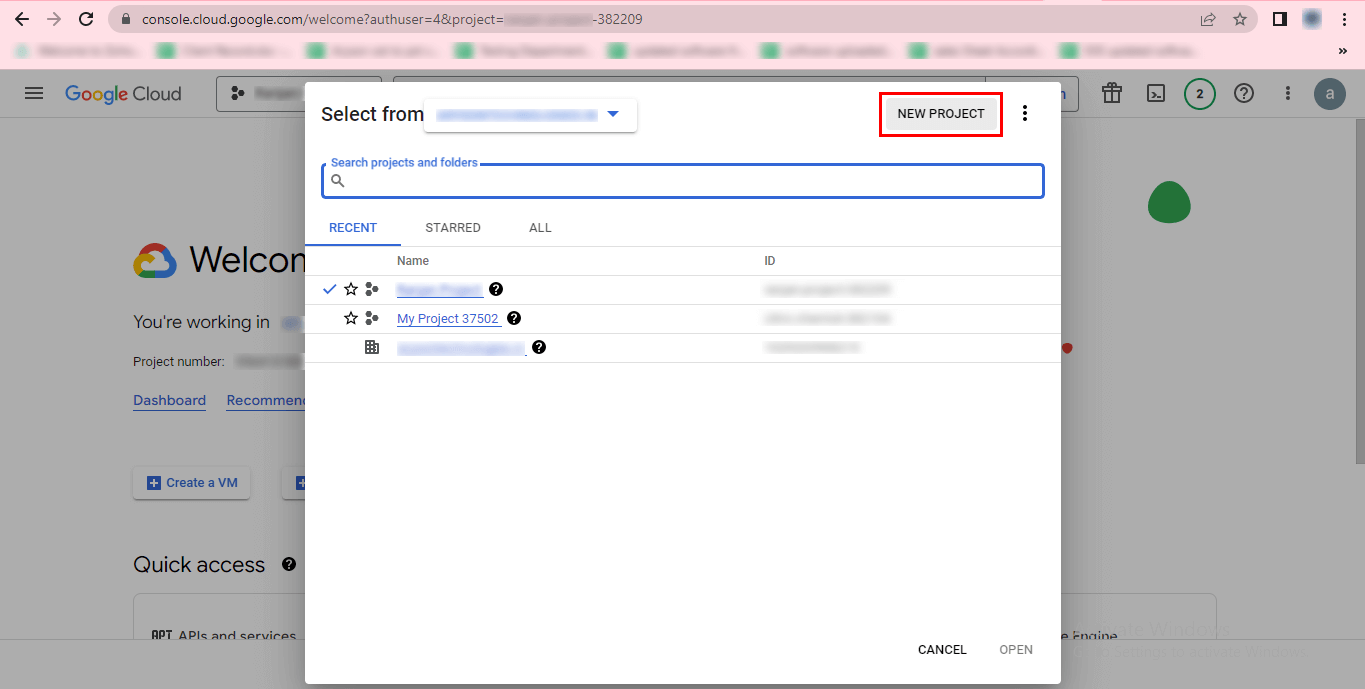
Step-4 In the pop-up window, click the New Project button.
Step-5 Enter the new project name and organization, then click the Create button.
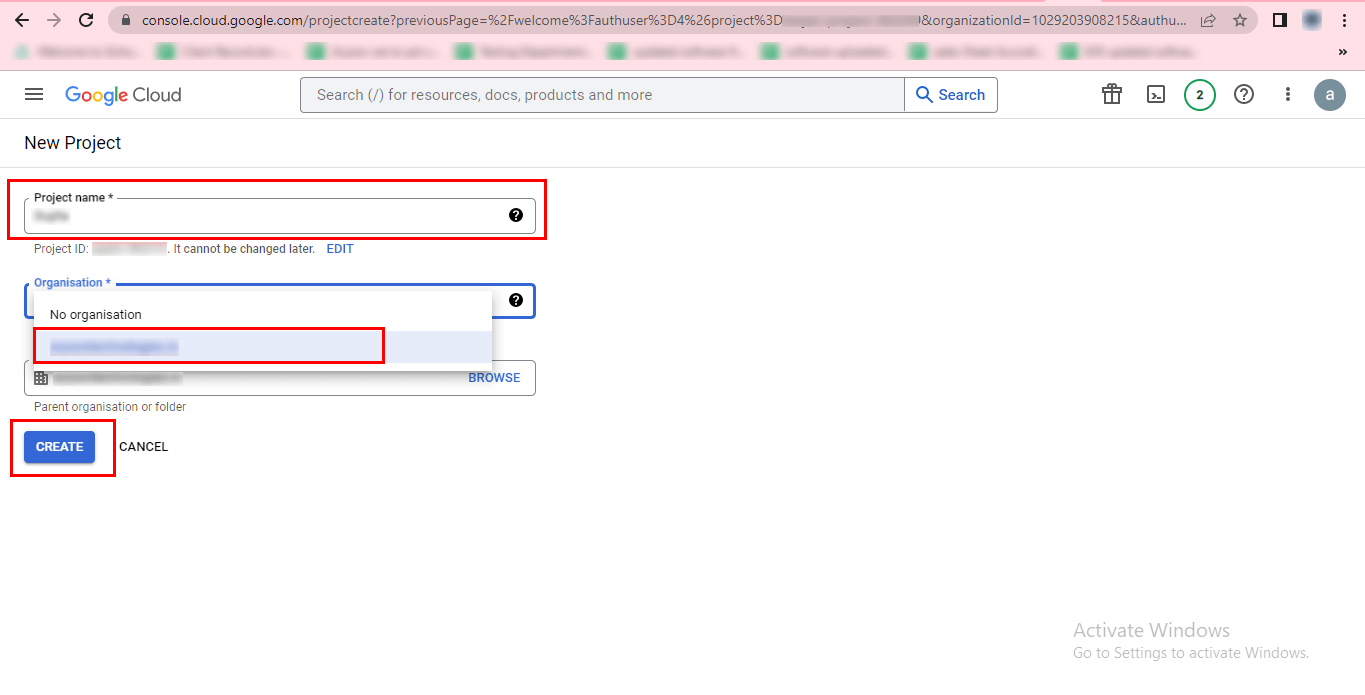
Step-6 You will see a message indicating that the new project has been created successfully.
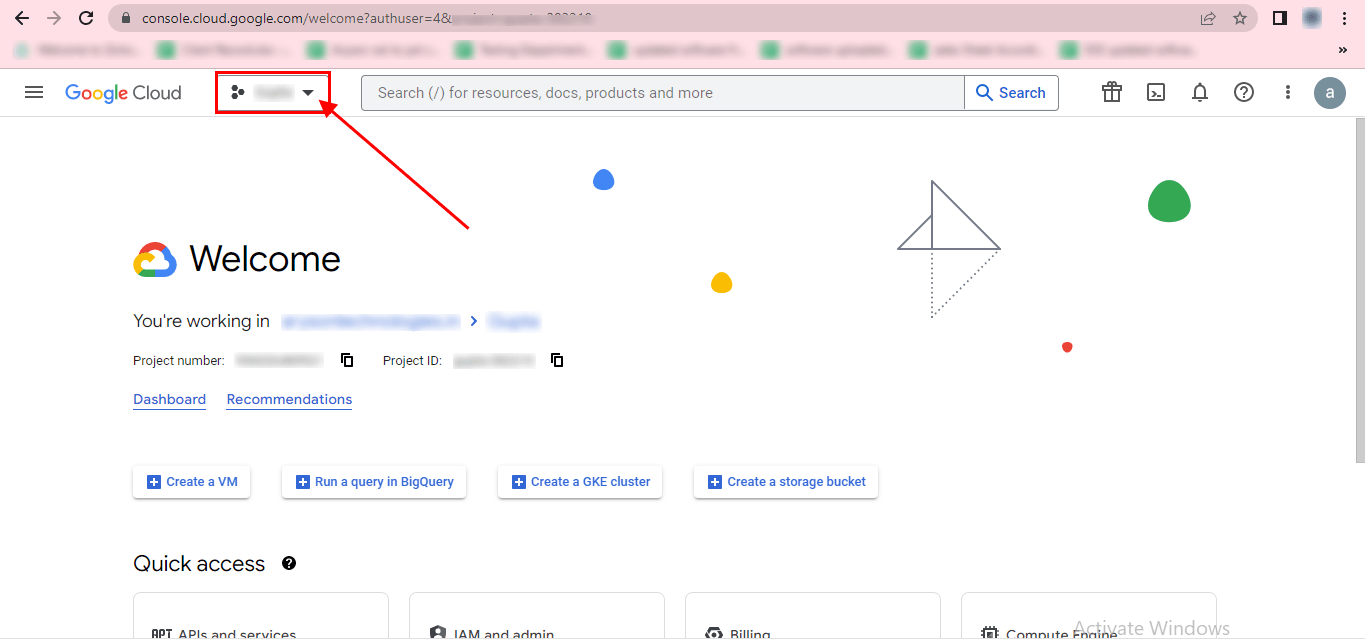
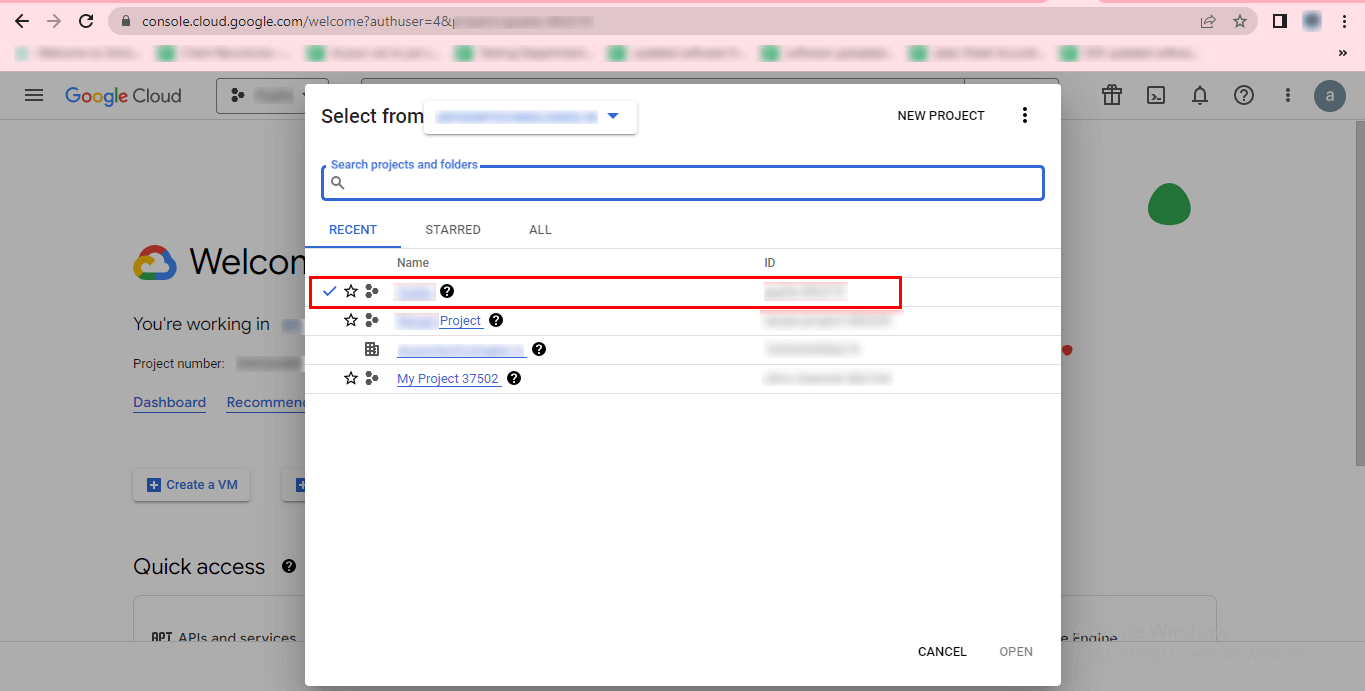
Step-7 Click on the newly created project, and you will see a checked mark. Click Cancel.
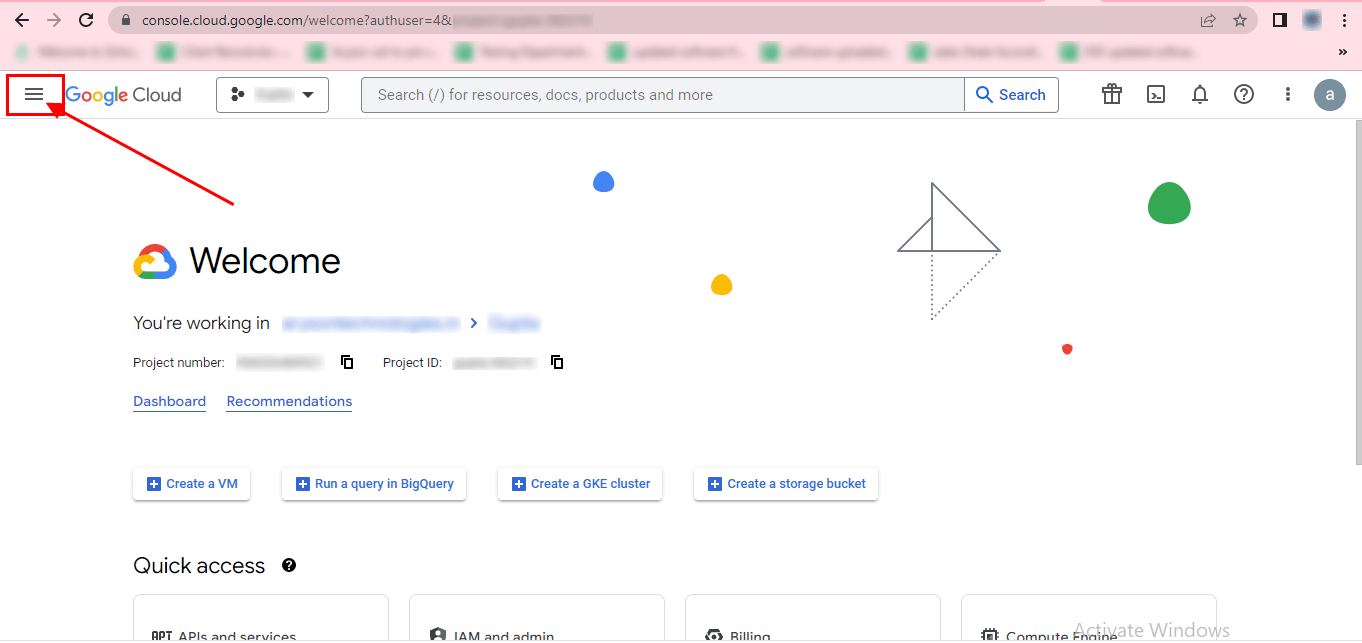
Step-8 Go to the menu (the three horizontal lines).
Step-9 Select APIs and Services from the drop-down menu.
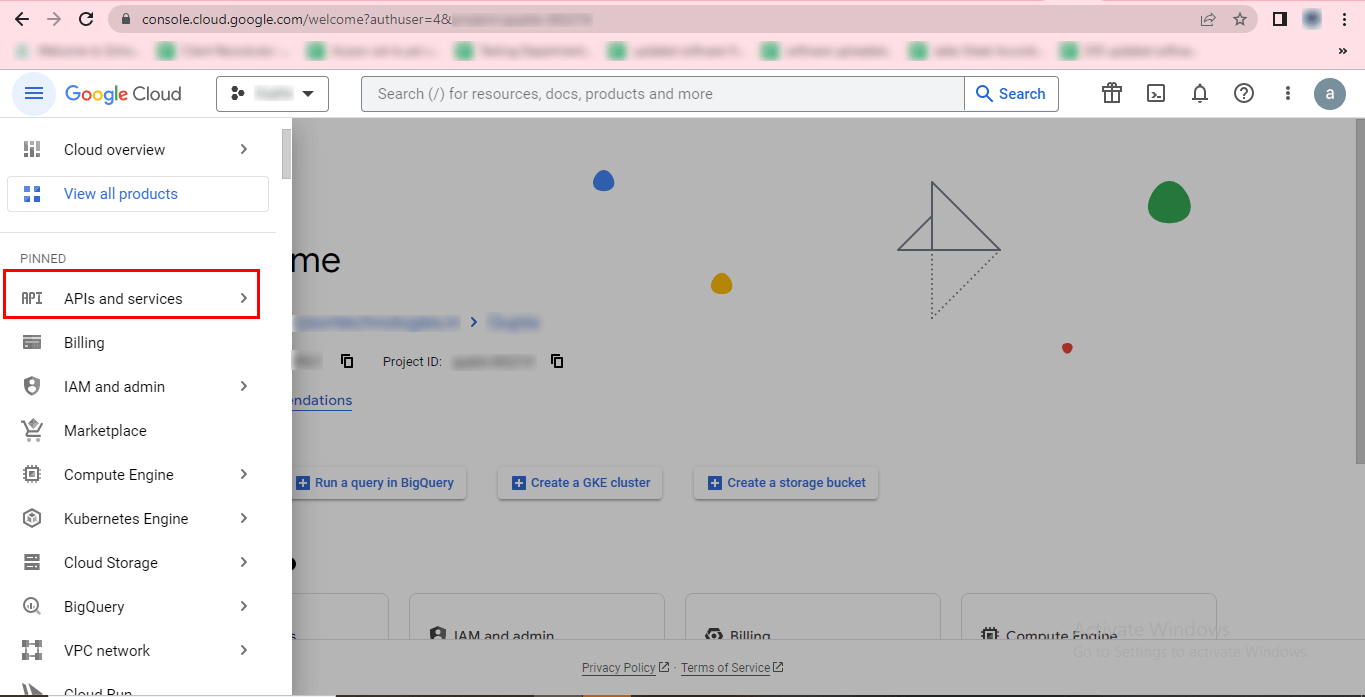
Step-10 Choose Credentials from the list.
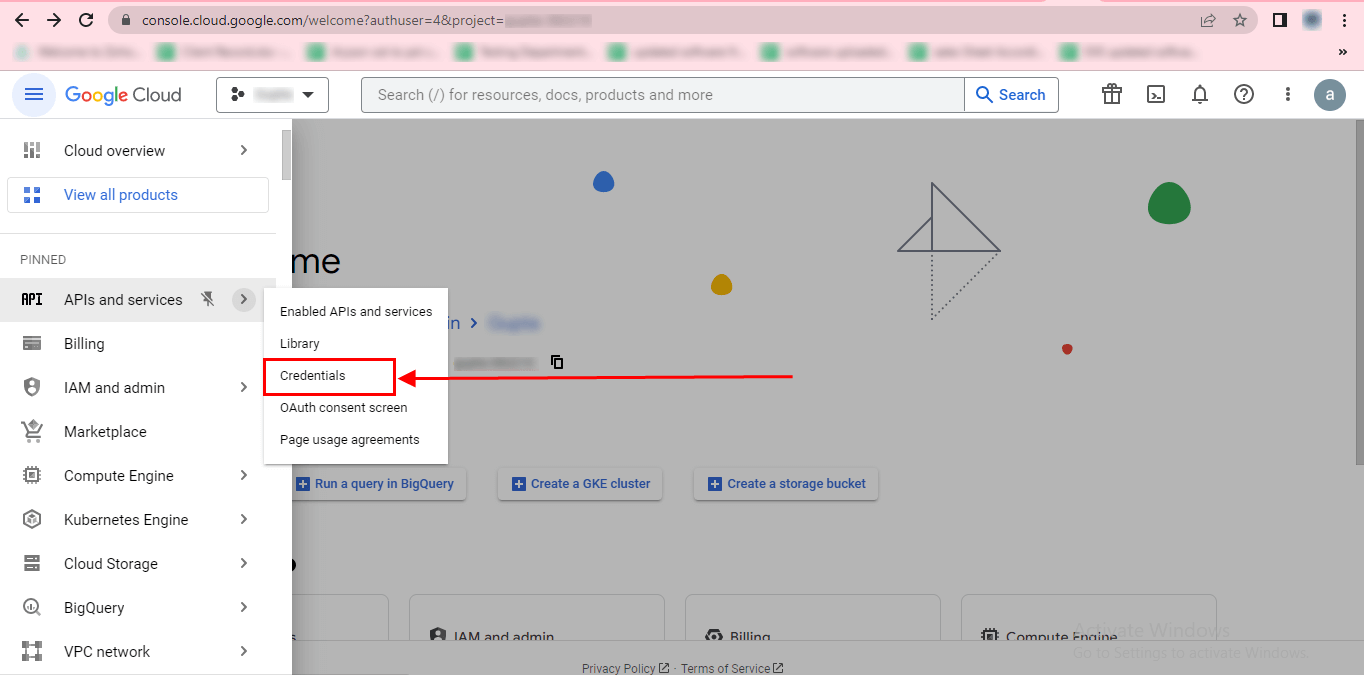
Step-11Choose Credentials from the list.
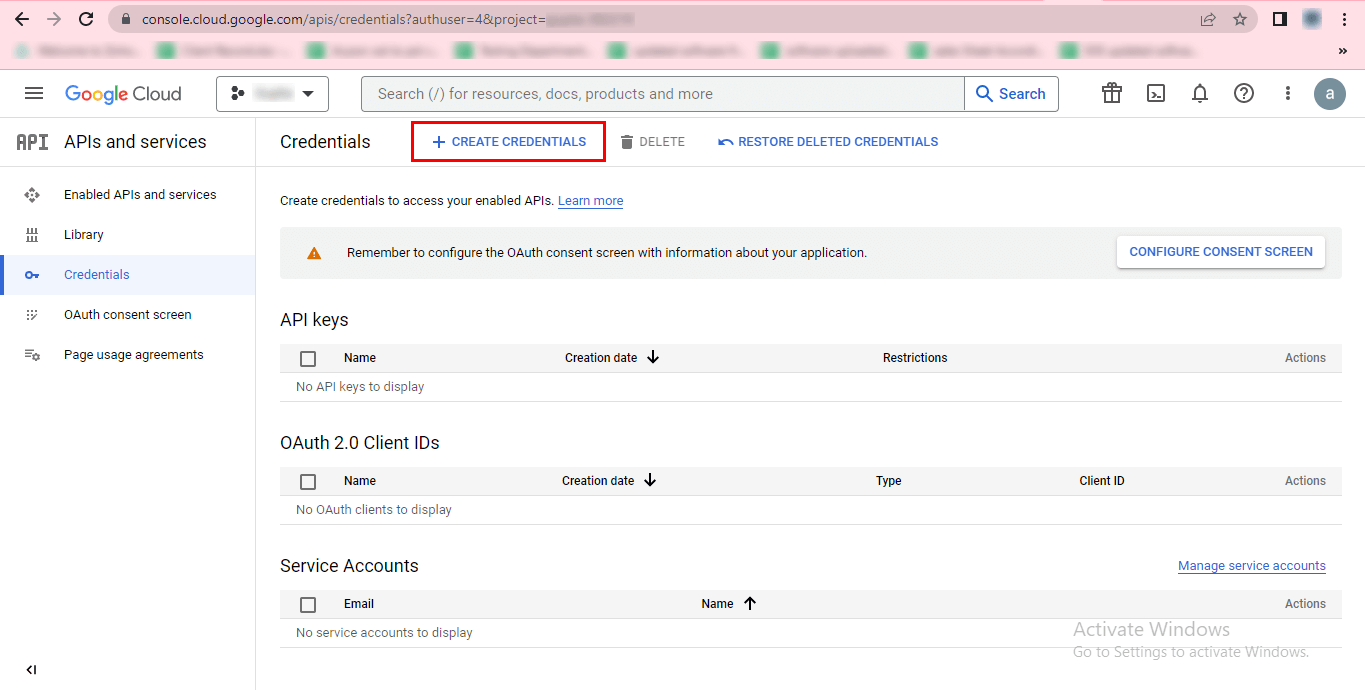
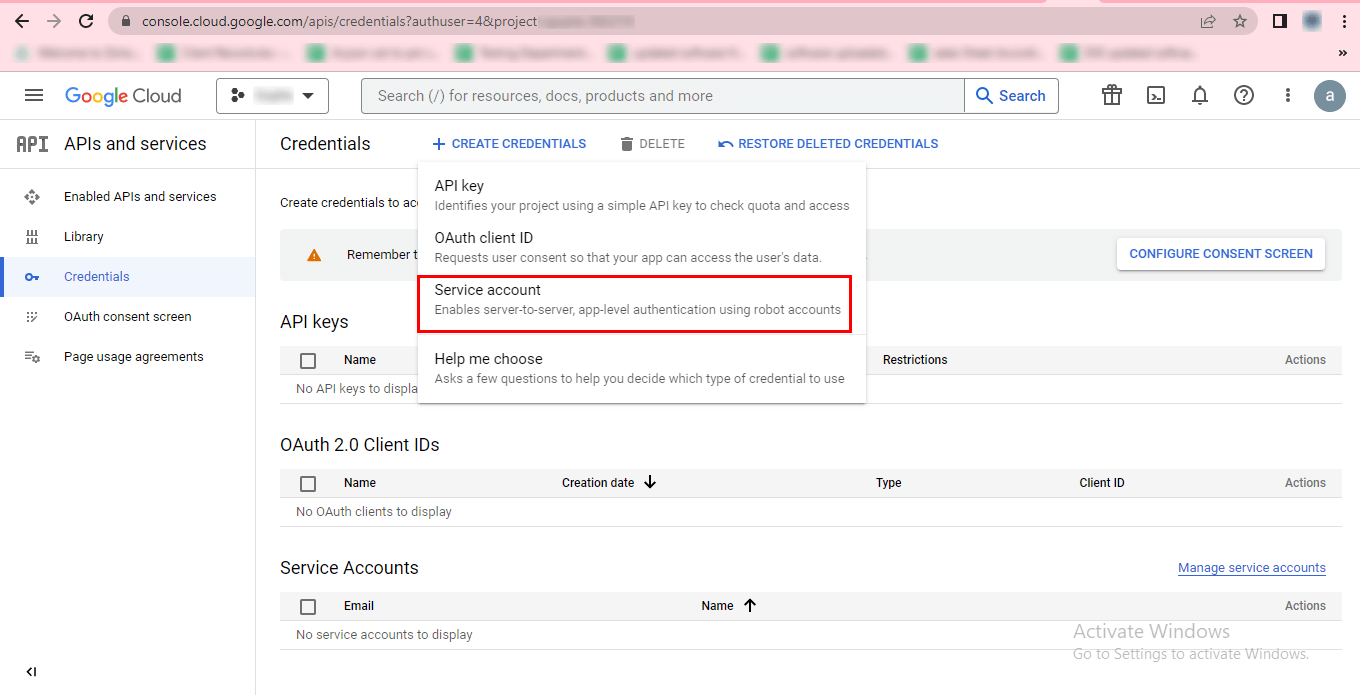
Step-12 Select Service account from the drop-down list.
Step-13 Enter the service account details, including the name, ID, and description.
Step-14 Click on the CREATE AND CONTINUE button.
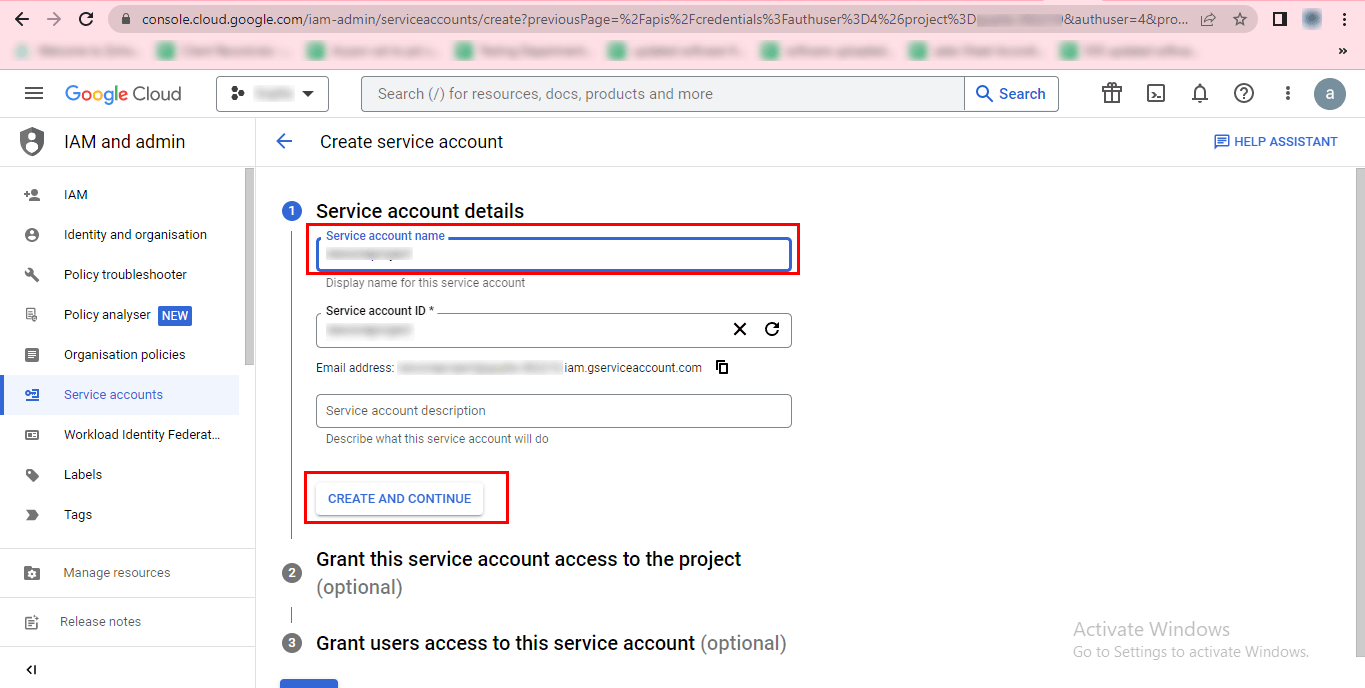
Step-15 Assign a role to the service account.
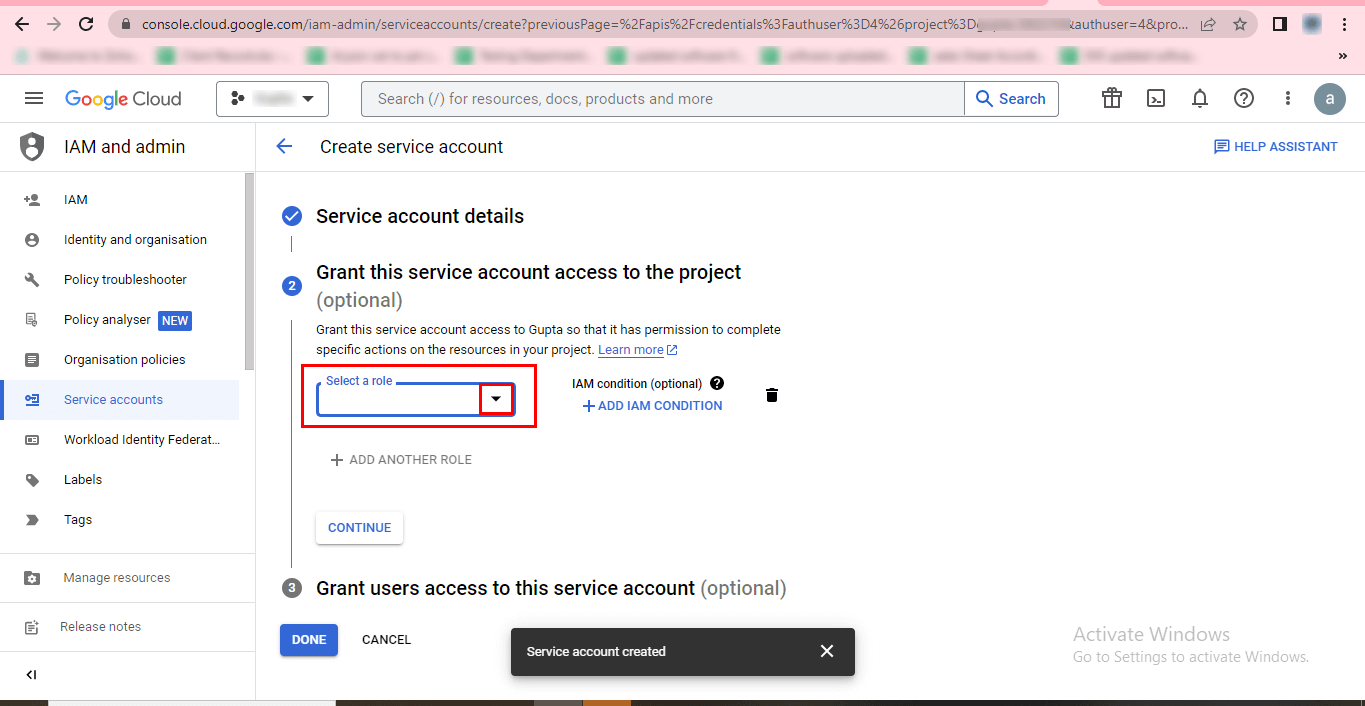
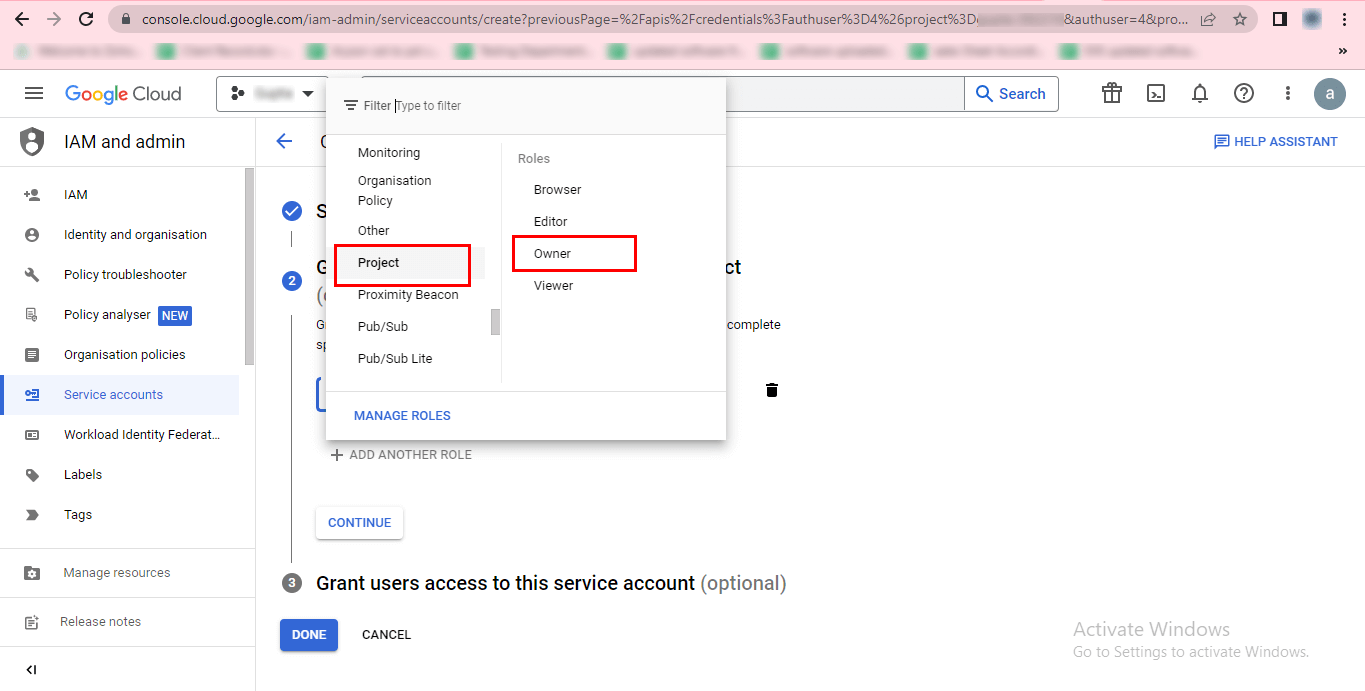
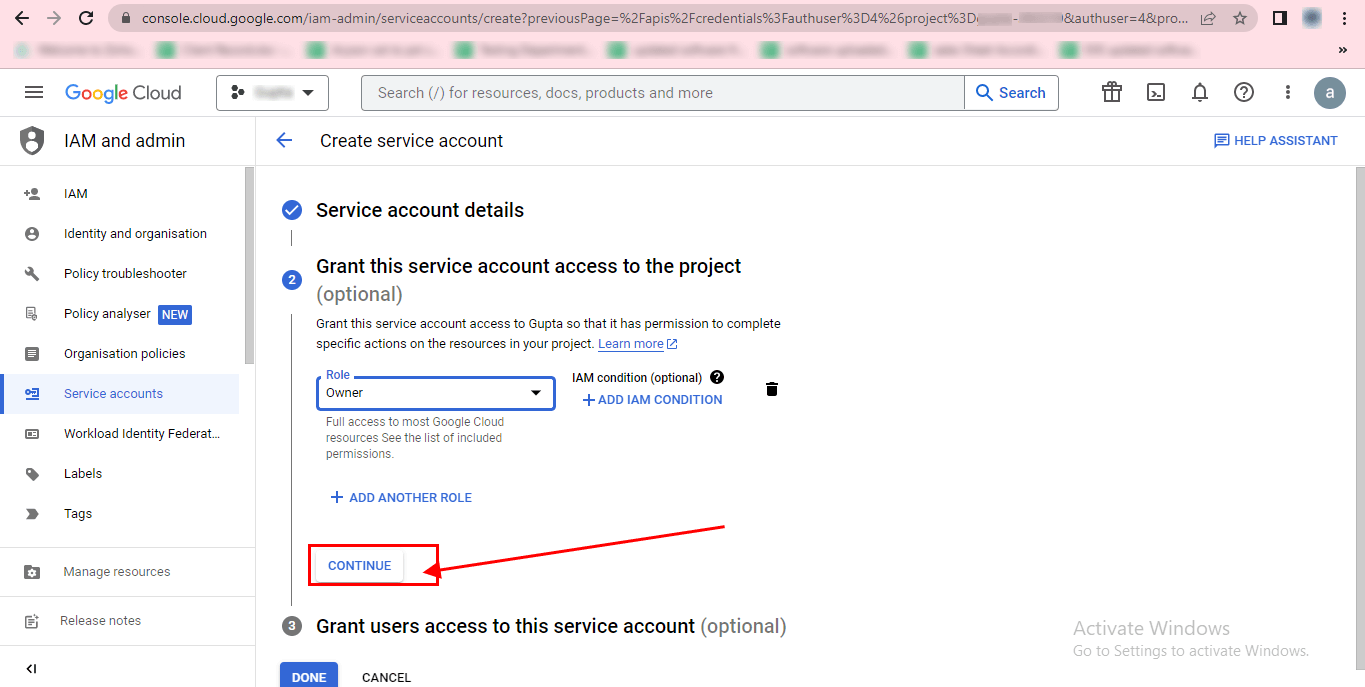
Step-16 You can select a specific role, for example, Owner.
Step-17 Click on the Continue button.
Step-18 Grant users access to this service account (optional).
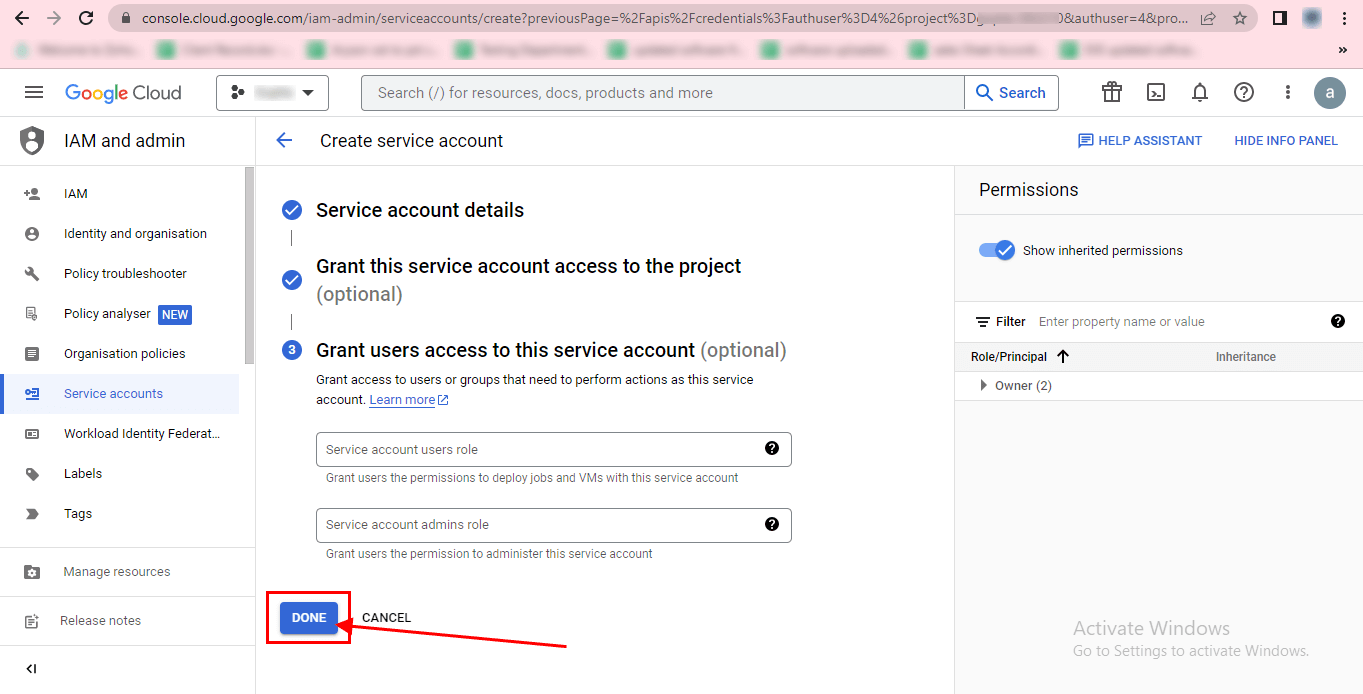
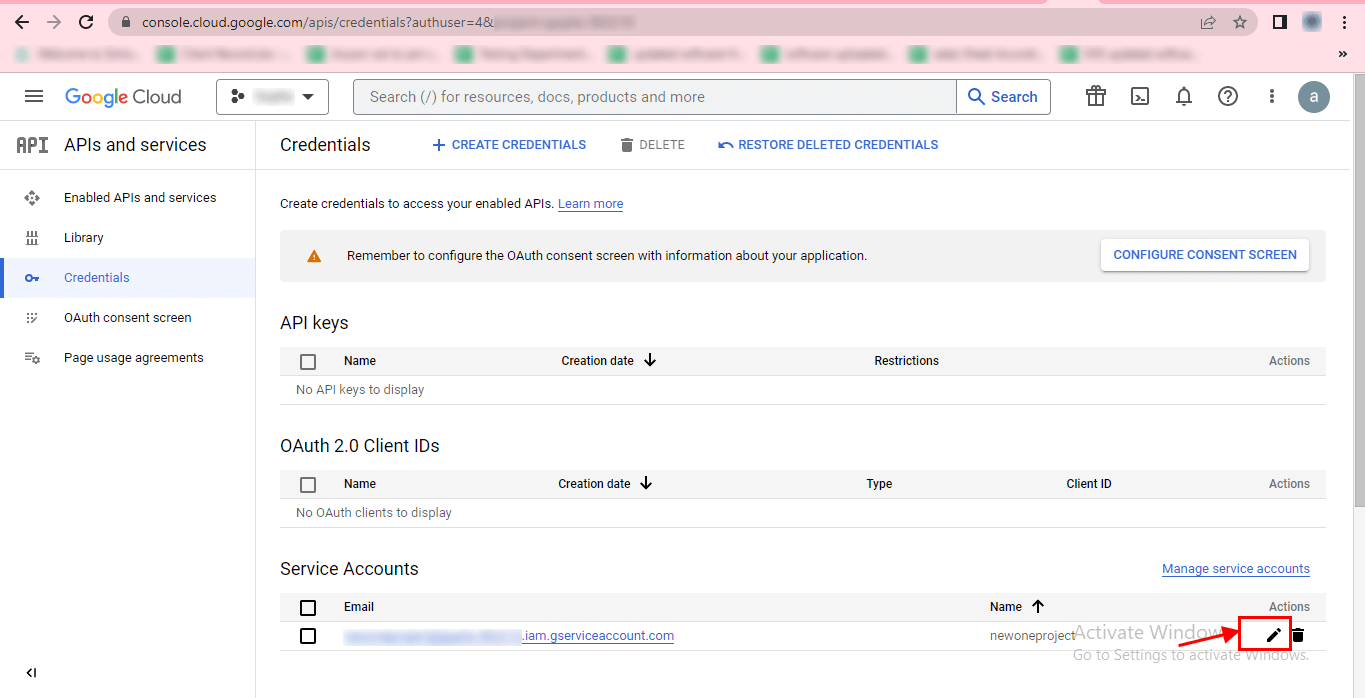
Step-19 Click the edit icon to appear on the newly created project.
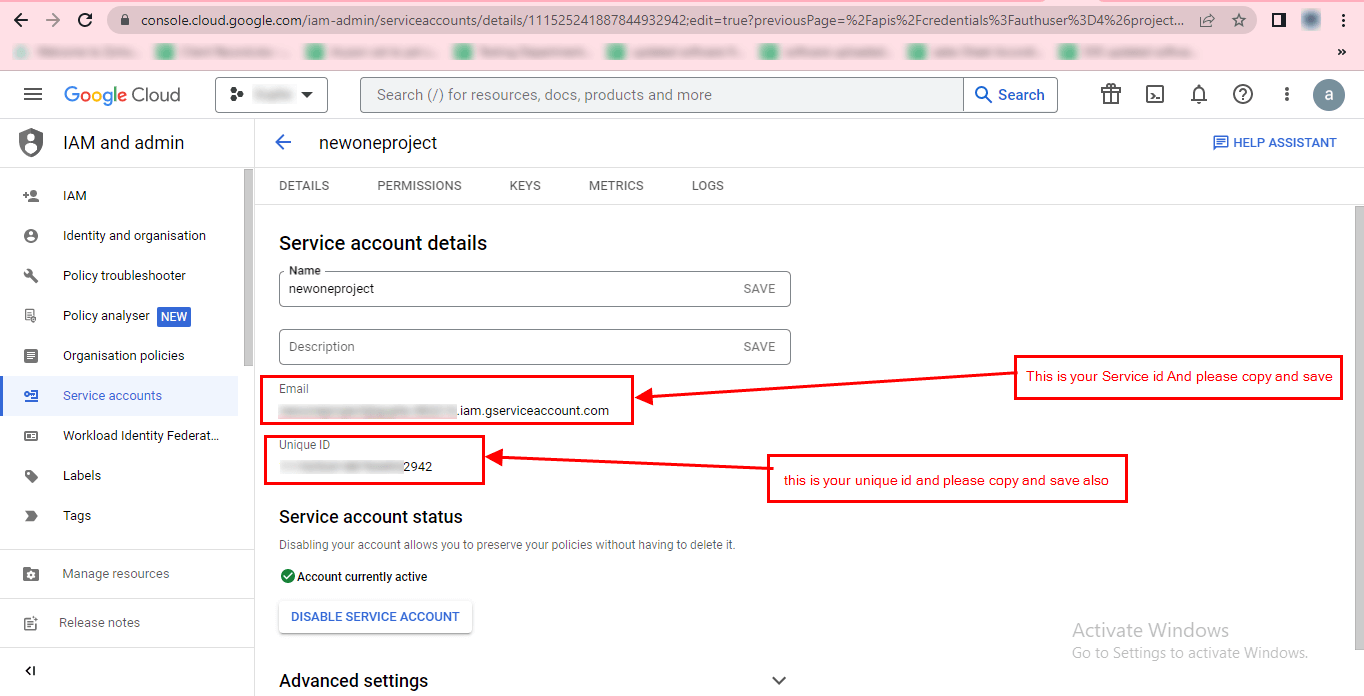
Step-20 Copy and save the service account ID (Email) and Unique ID at any desired location for future use.
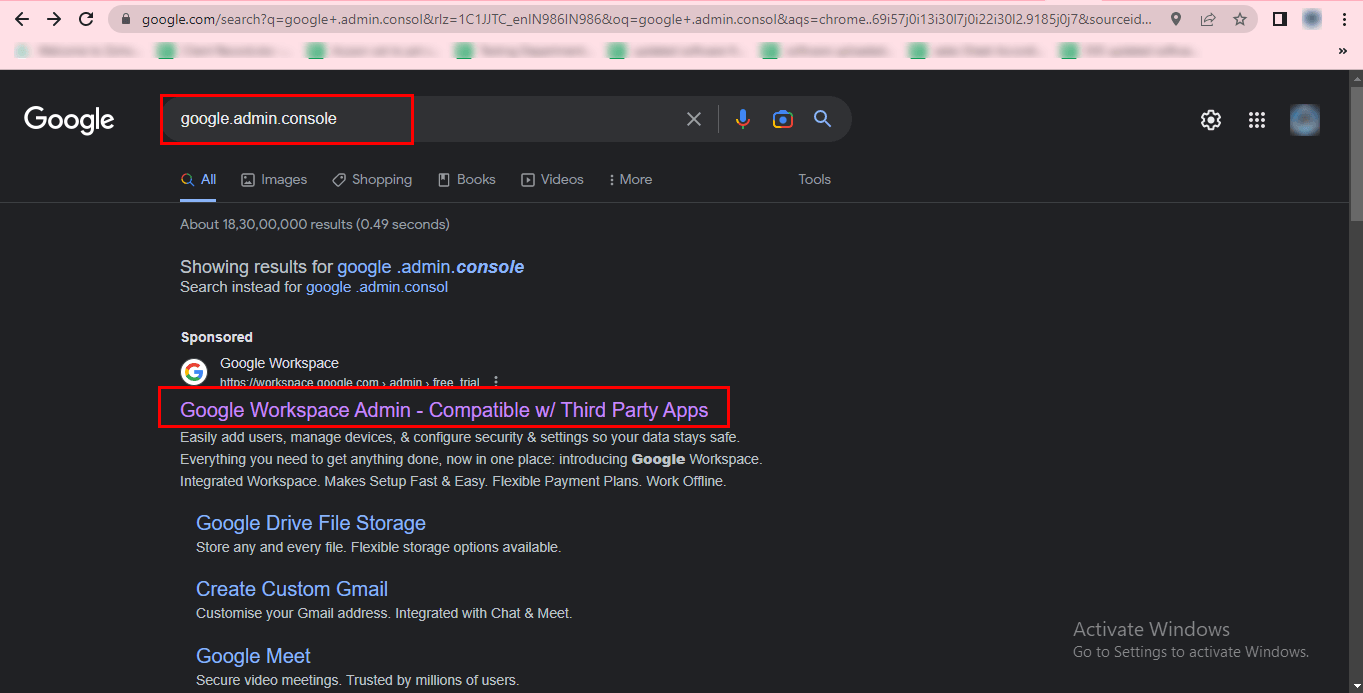
Step-21 Search for google.admin.console on Google and click on the first result, which should say Google Workspace Admin.
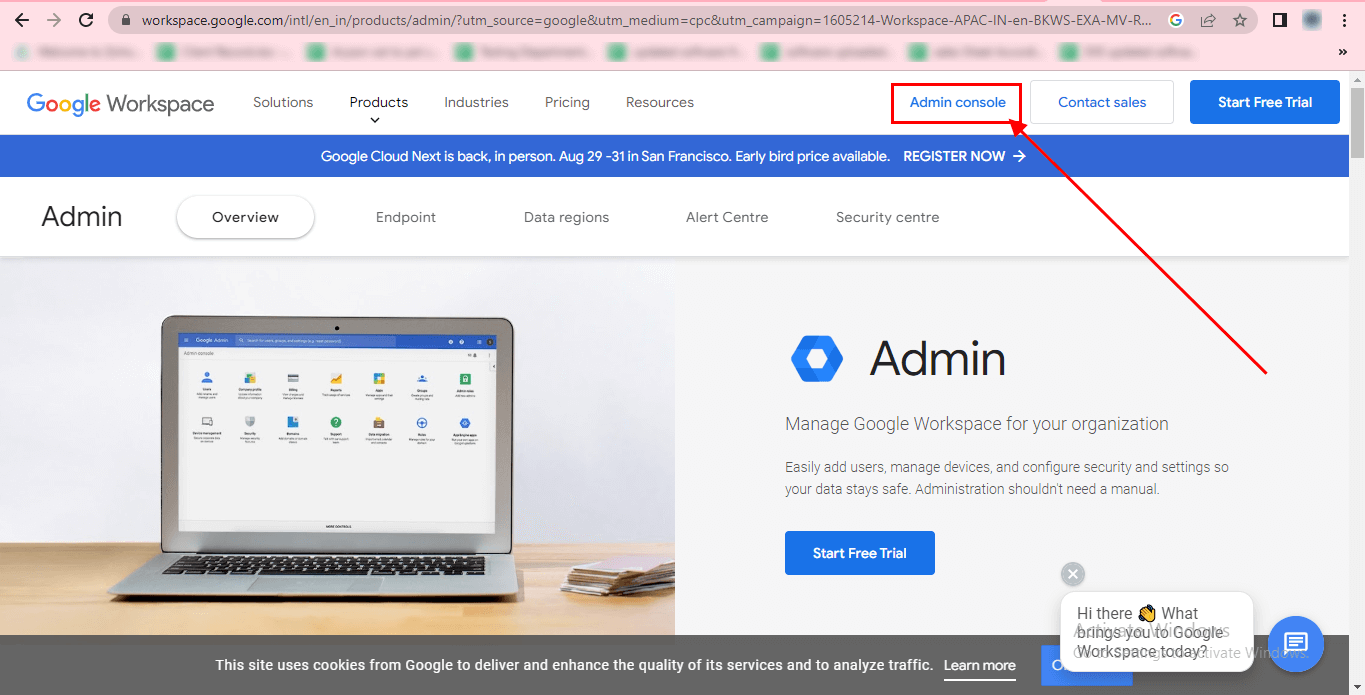
Step-22 Click on the Admin console button.
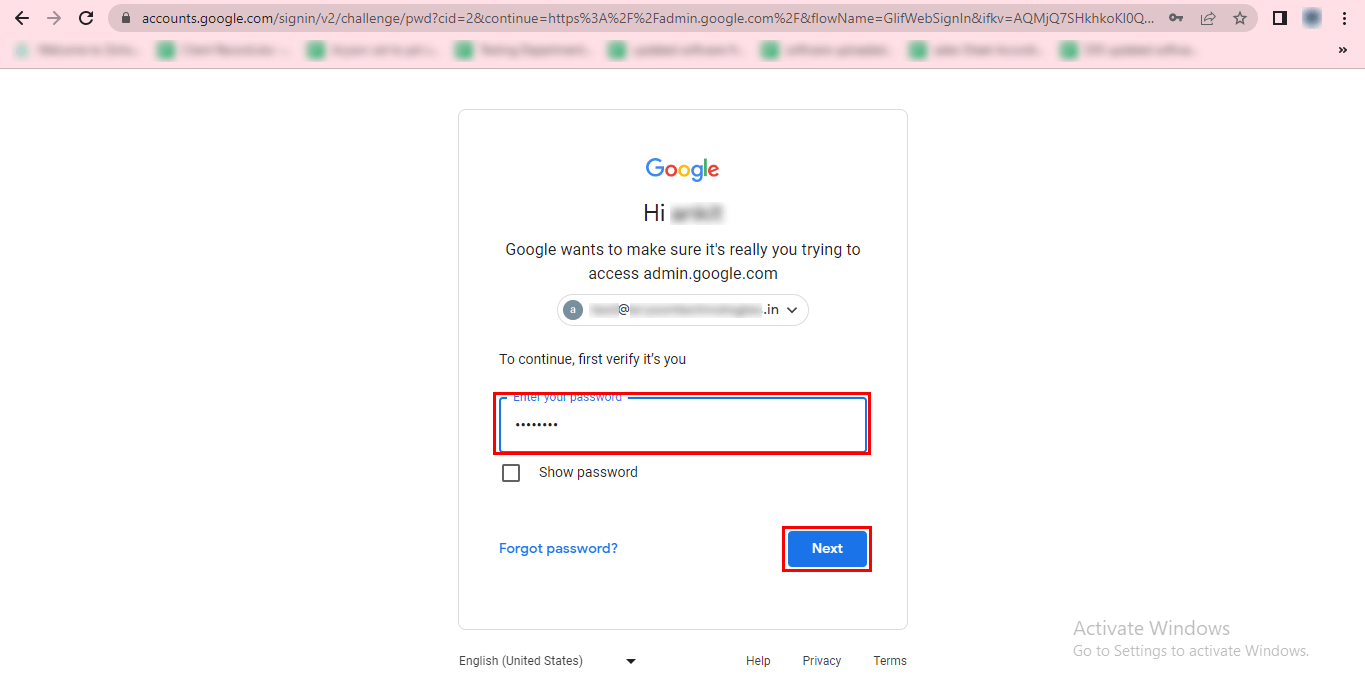
Step-23 Login to your admin account by entering your account password and clicking Next.
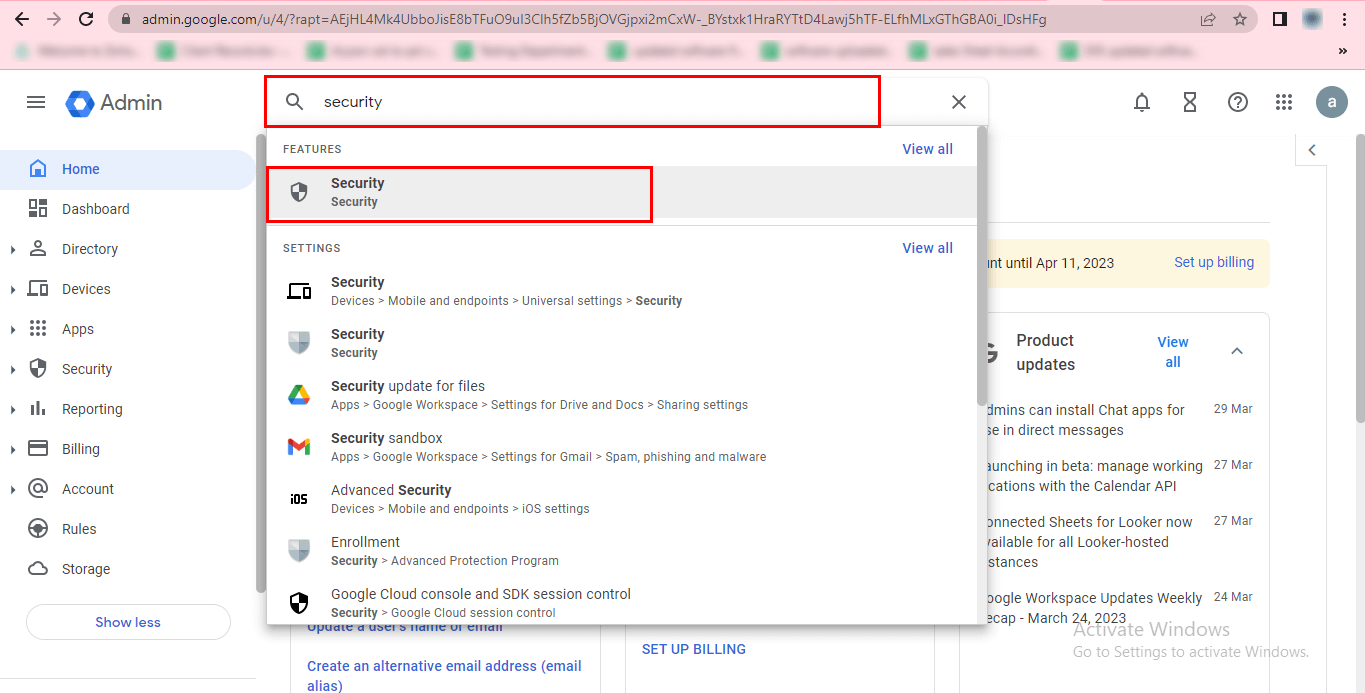
Step-24 Search for Security and click on it.
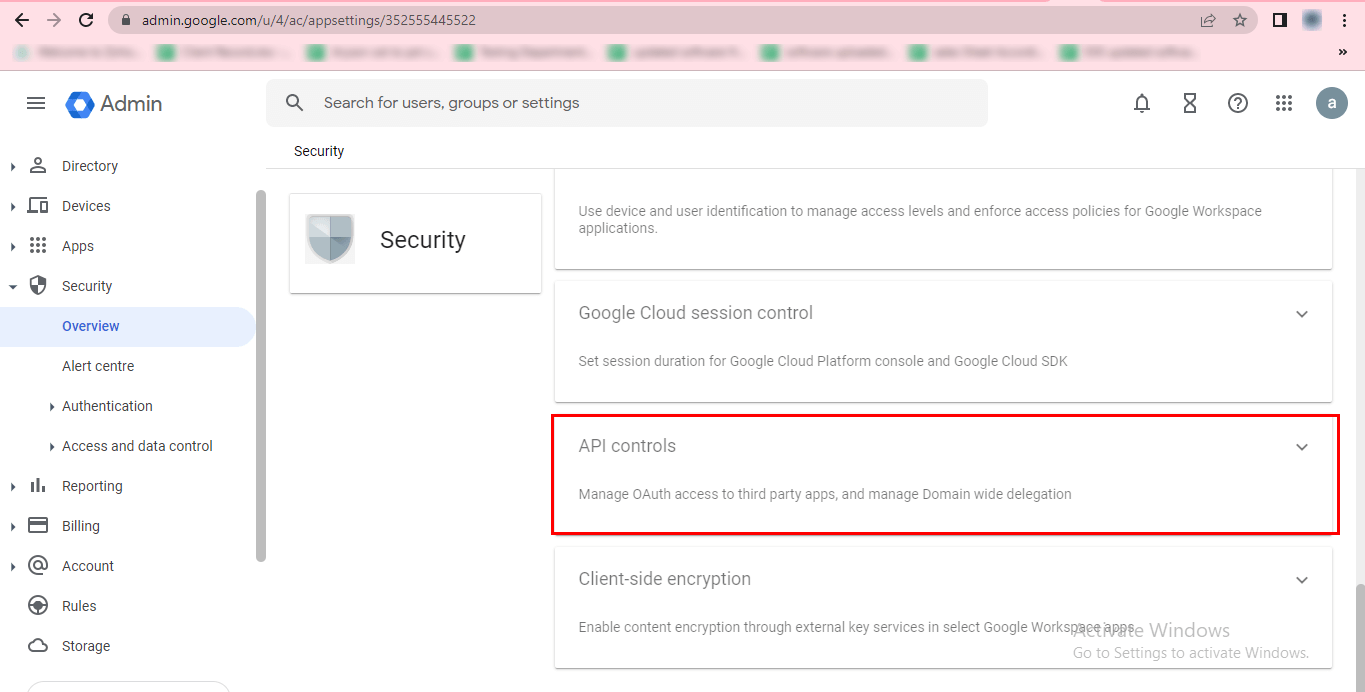
Step-25 In the Security section, click on the API controls option.
Step-26 Go to the Domain-wide delegation section and click the MANAGE DOMAIN-WIDE DELEGATION option.
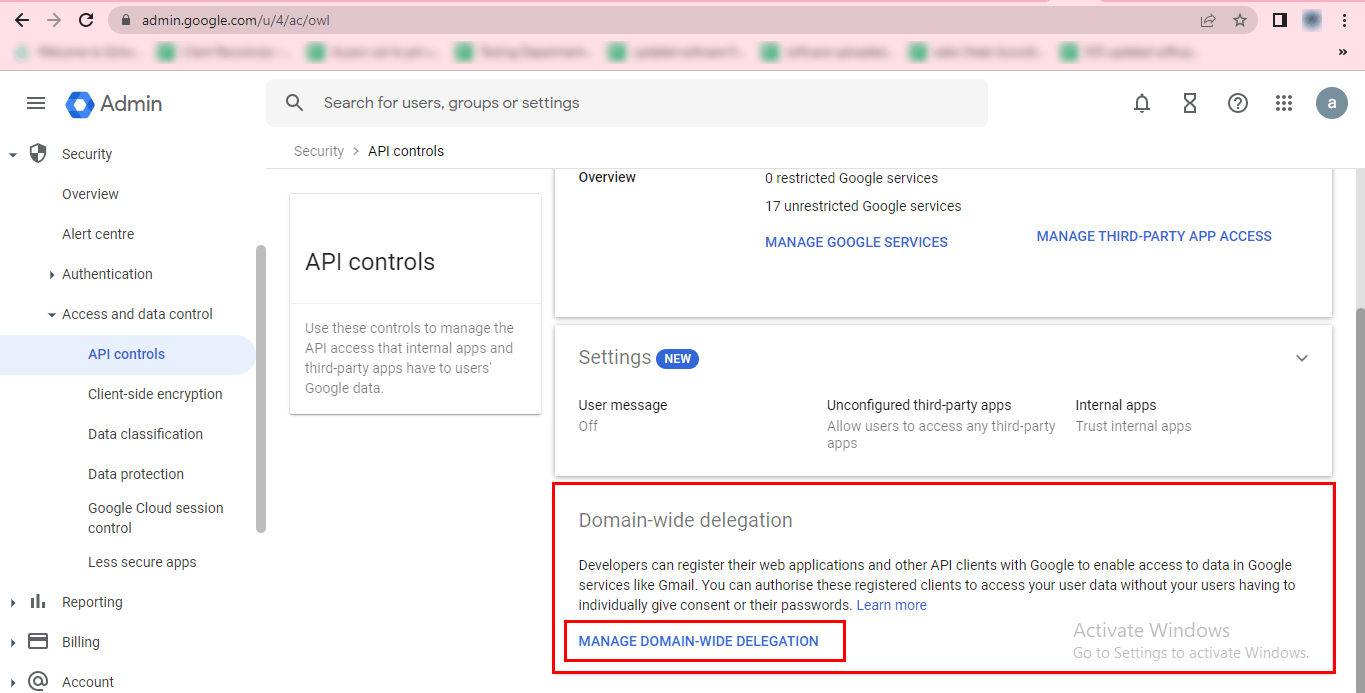
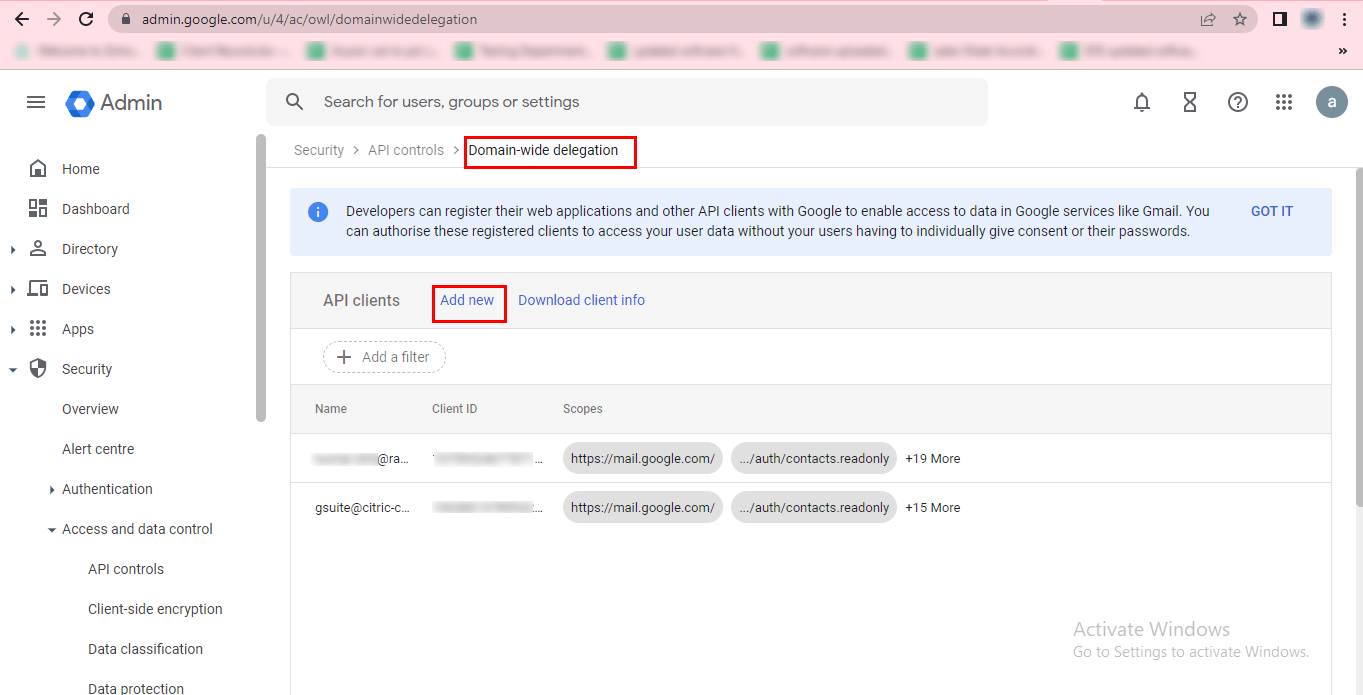
Step-27 Click on the Add New option.
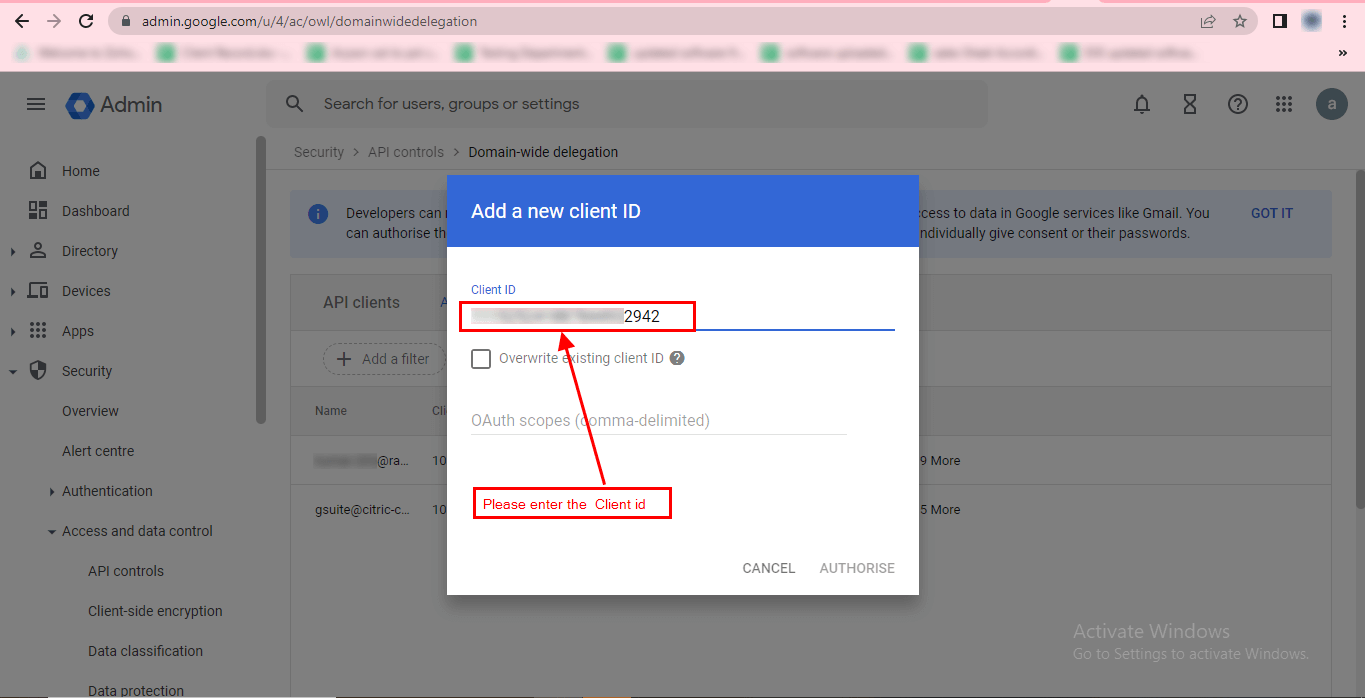
Step-28 In the pop-up tab, enter the client ID saved earlier.
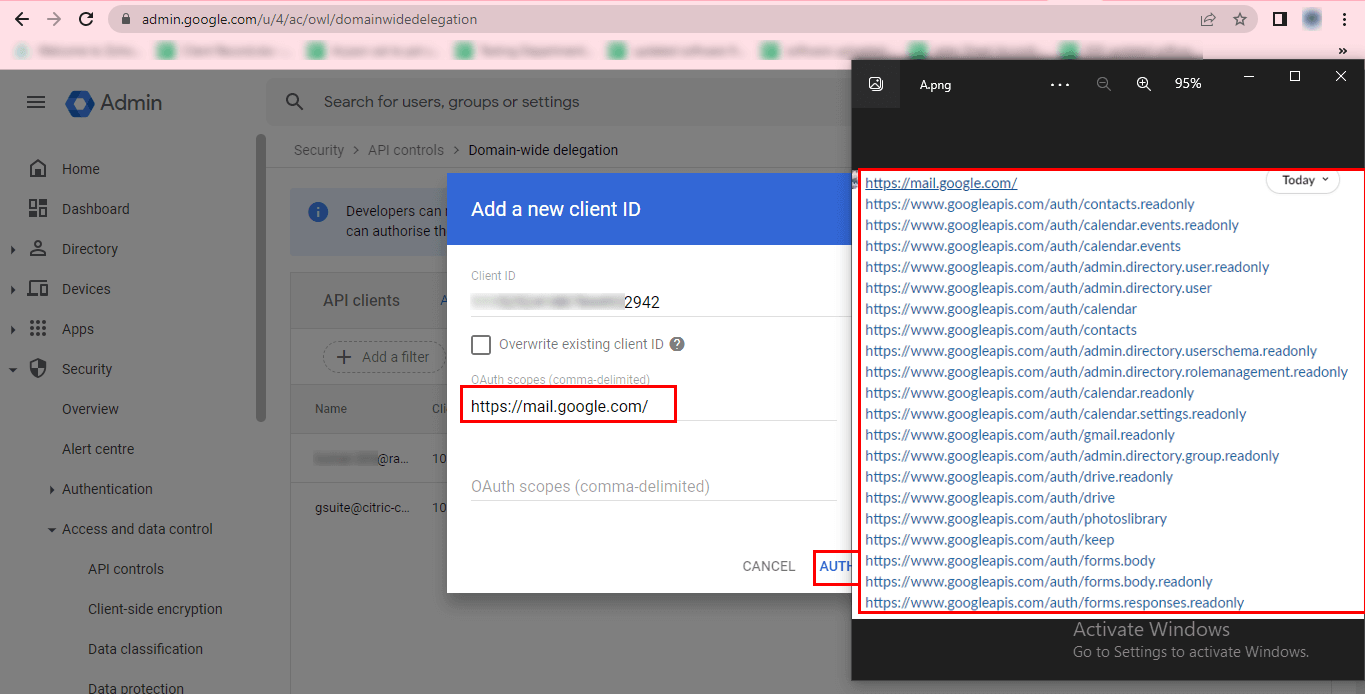
Step-29 Add the different scopes mentioned in the list above and click the AUTHORIZE button.
Step-30 Search for gcp on Google and click on the first result, which should say "Google Cloud Platform (GCP) - Tools and Modern Applications
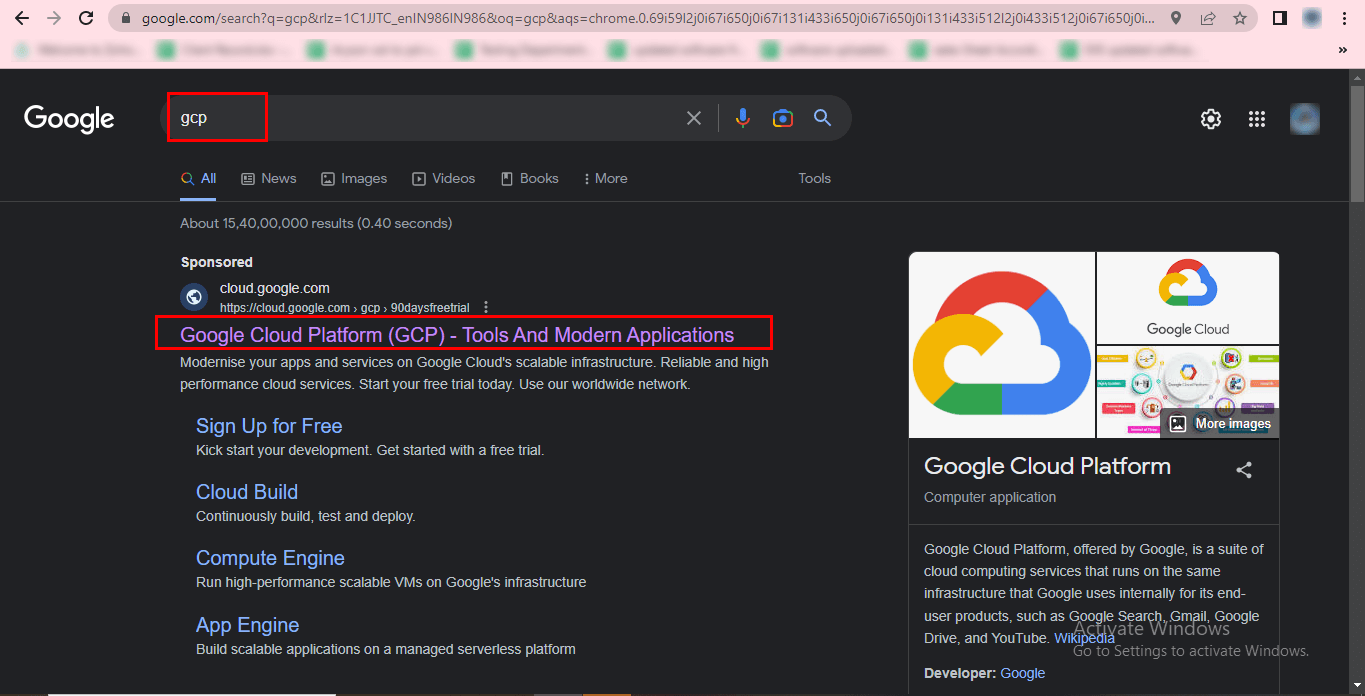
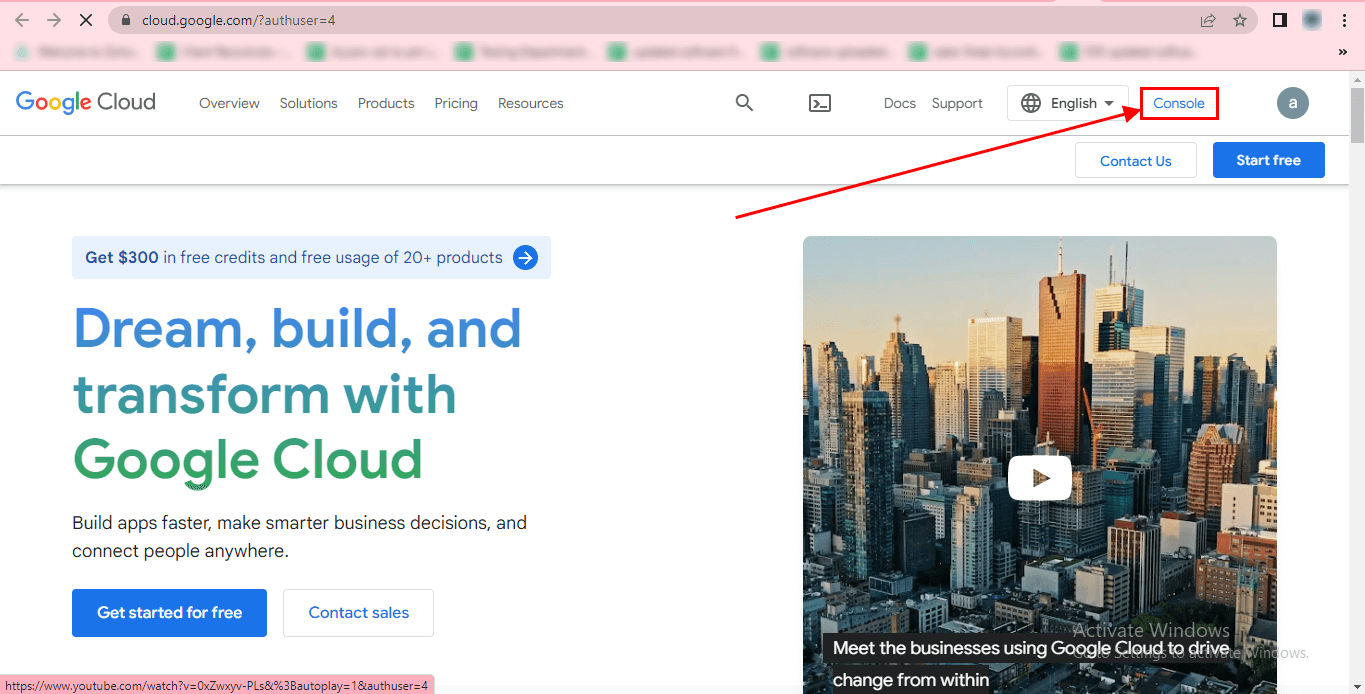
Step-31 In the opening dashboard, click on the Console option.
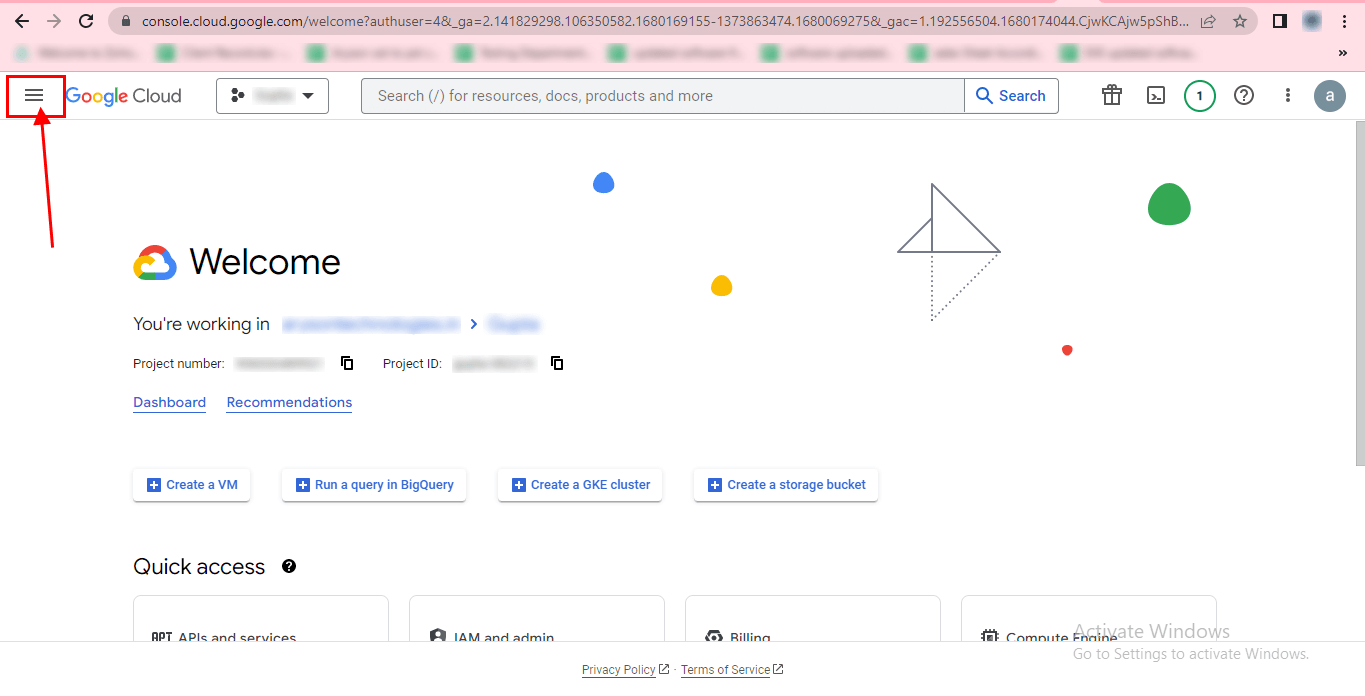
Step-32 Go to the menu (the three horizontal lines).
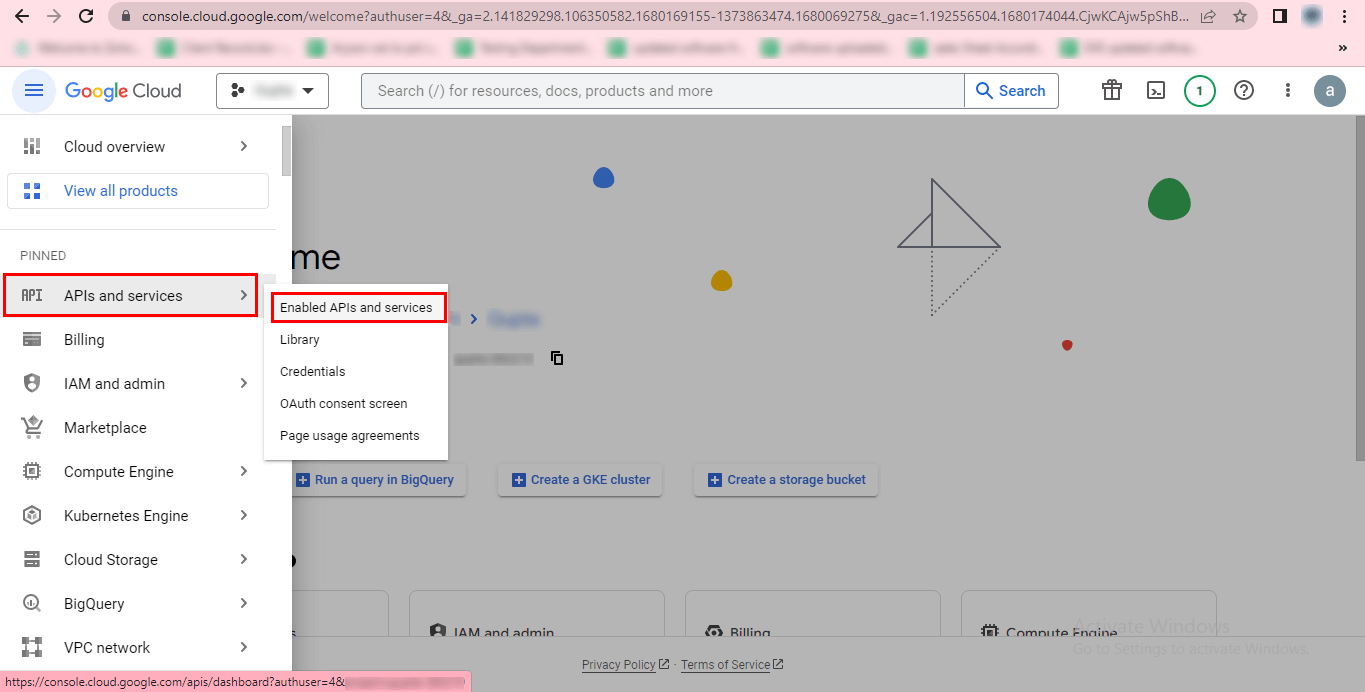
Step-33 Choose APIs and Services >> Enabled APIs and services.
Step-34 Click on the ENABLE APIS AND SERVICES option.
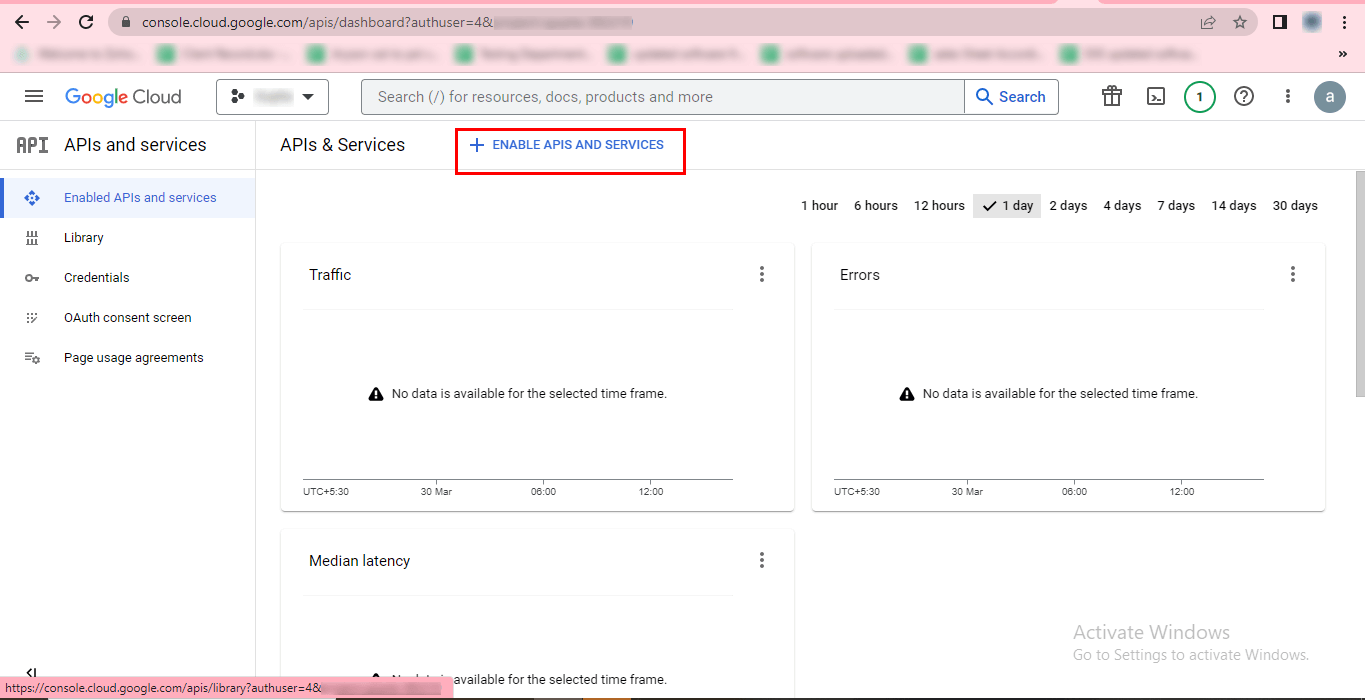
Step-35 In the search box, open and Enable each library as given below:-
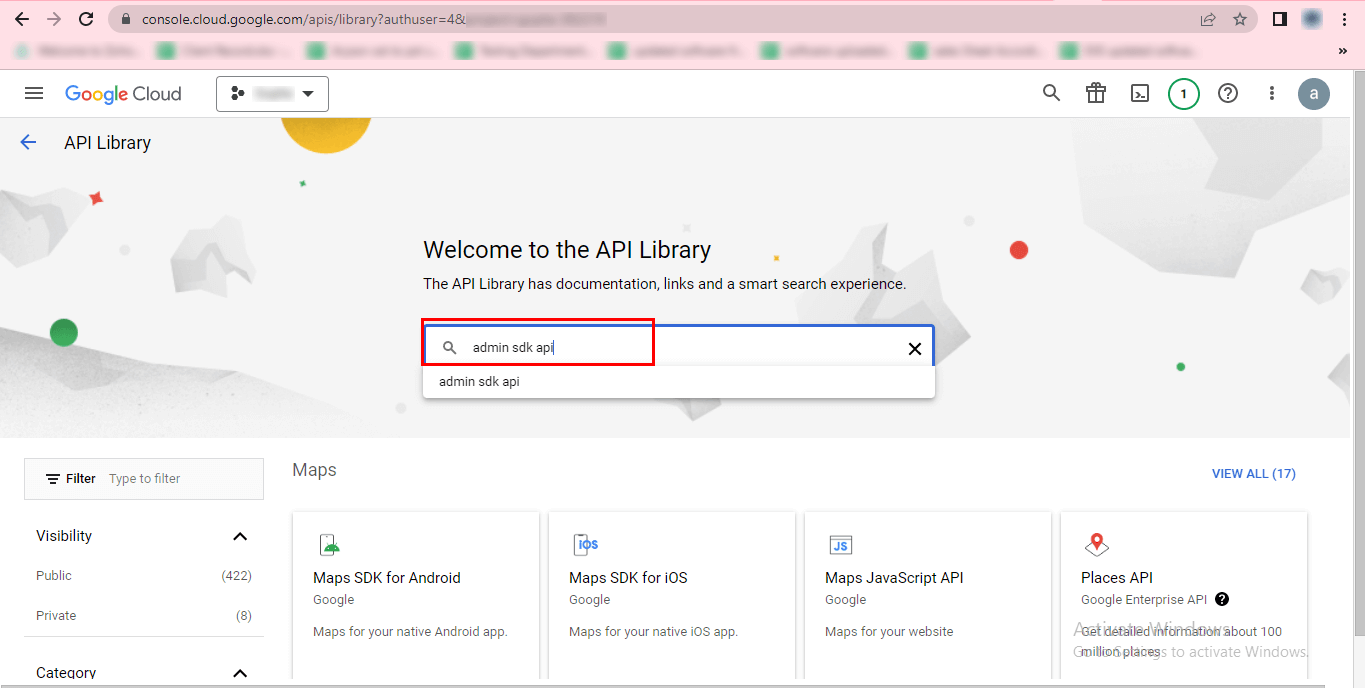
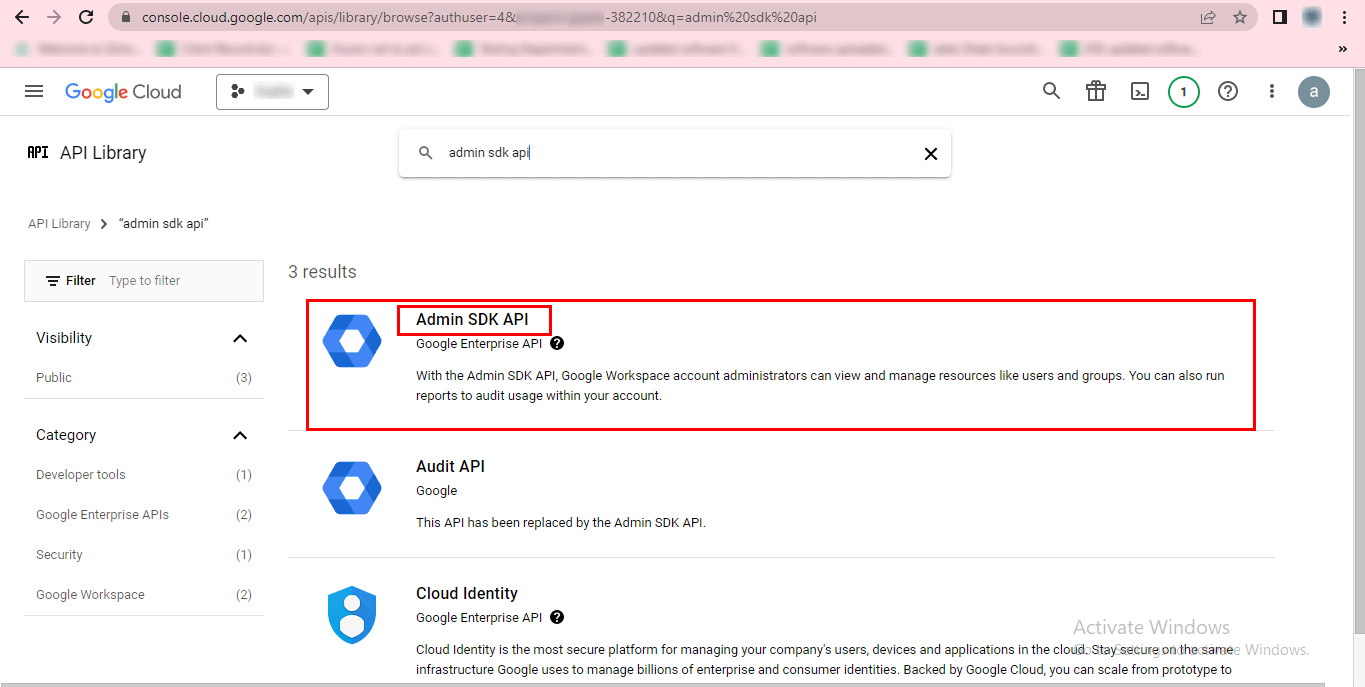
Step-36 Navigate to the Admin SDK API and click on it.
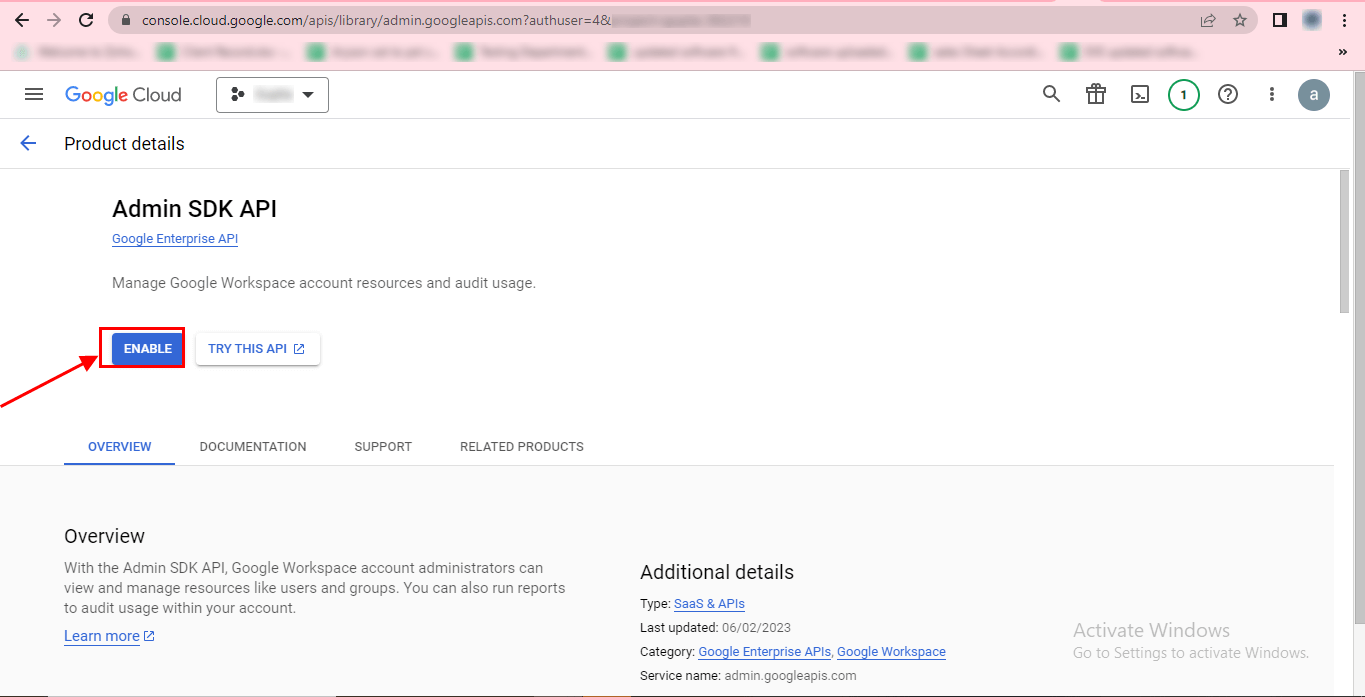
Step-37 Click the ENABLE button to enable the Admin SDK API.
Step-38 Repeat the previous steps for any other APIs you need to enable.
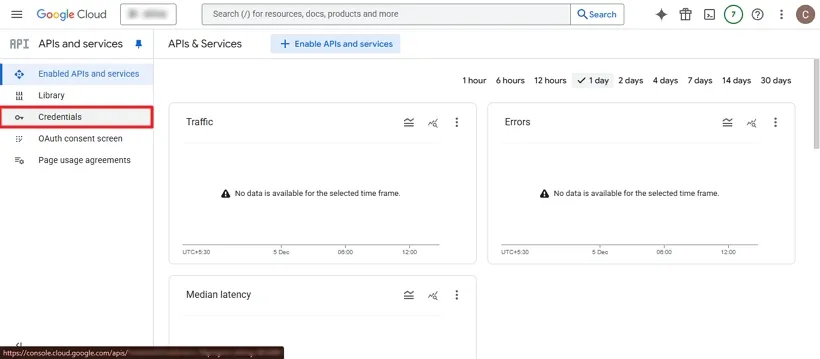
Step-39 Click on the Credentials option in the menu (represented by three horizontal lines).
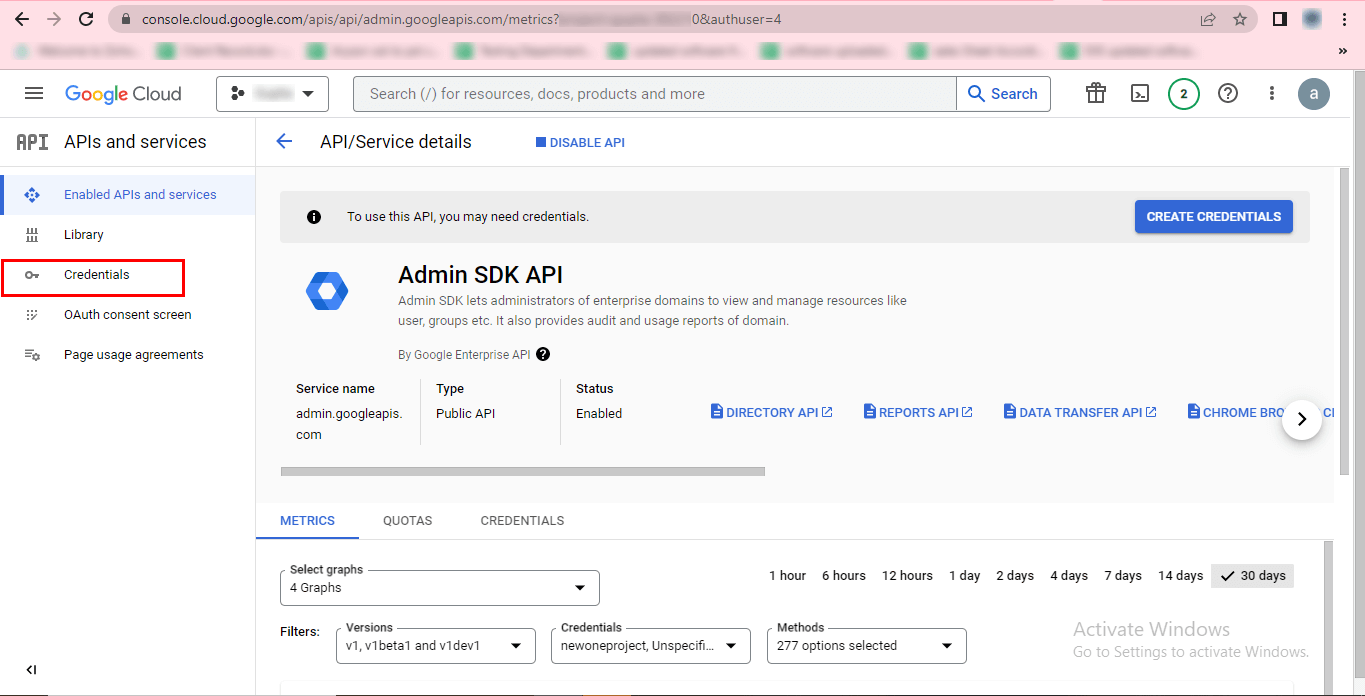
Step-40 Click on the edit icon.
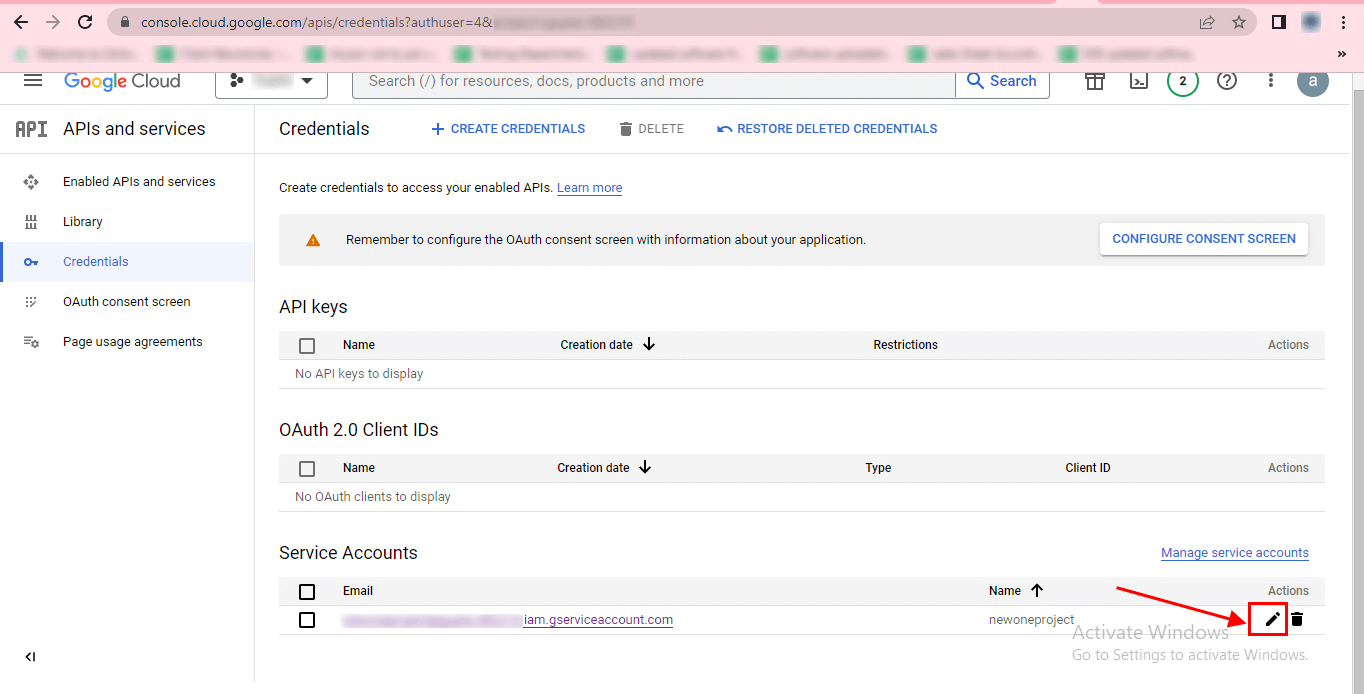
Step-41 Select the KEYS section.
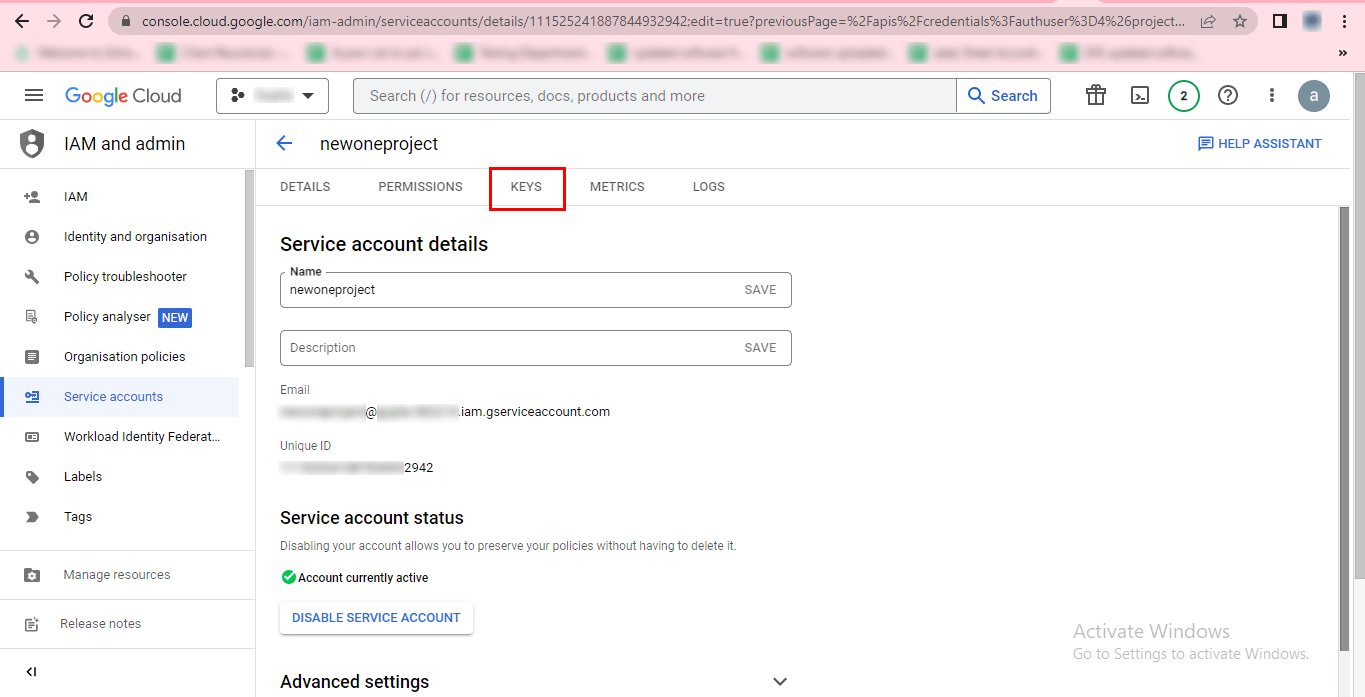
Step-42 Click on the ADD KEY button.
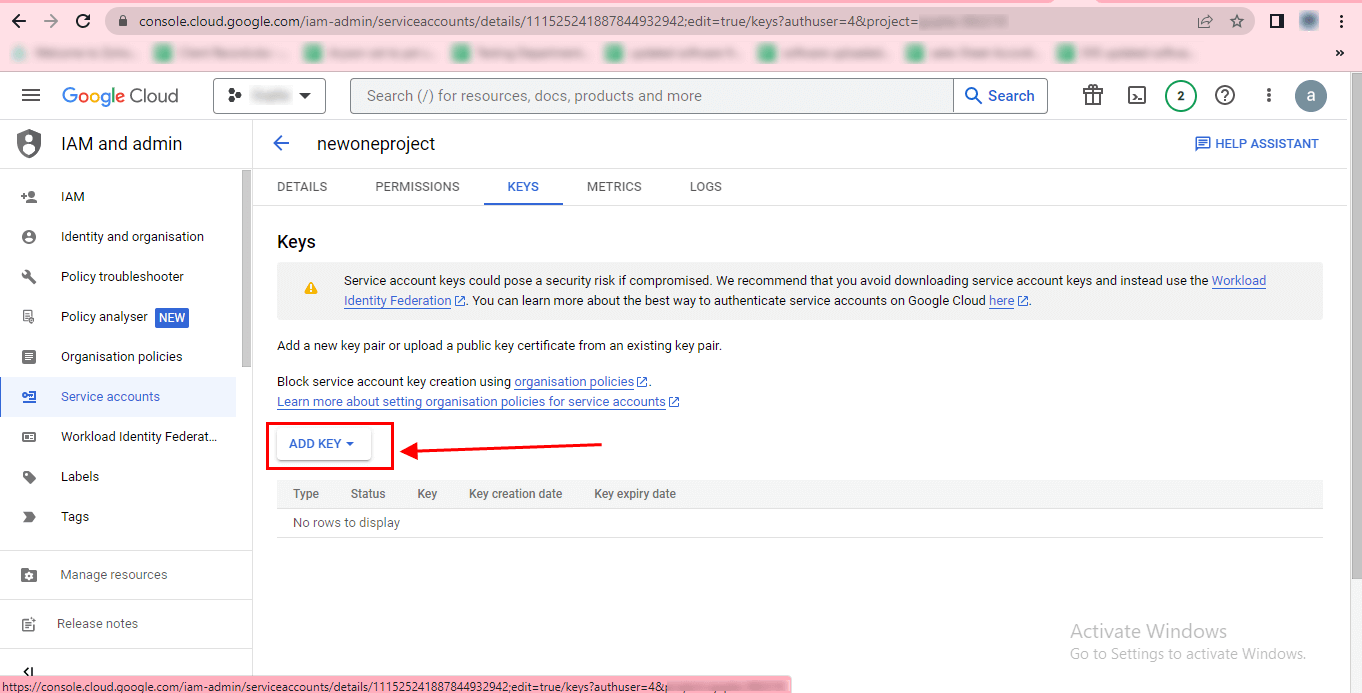
Step-43 Choose Create new key from the options.
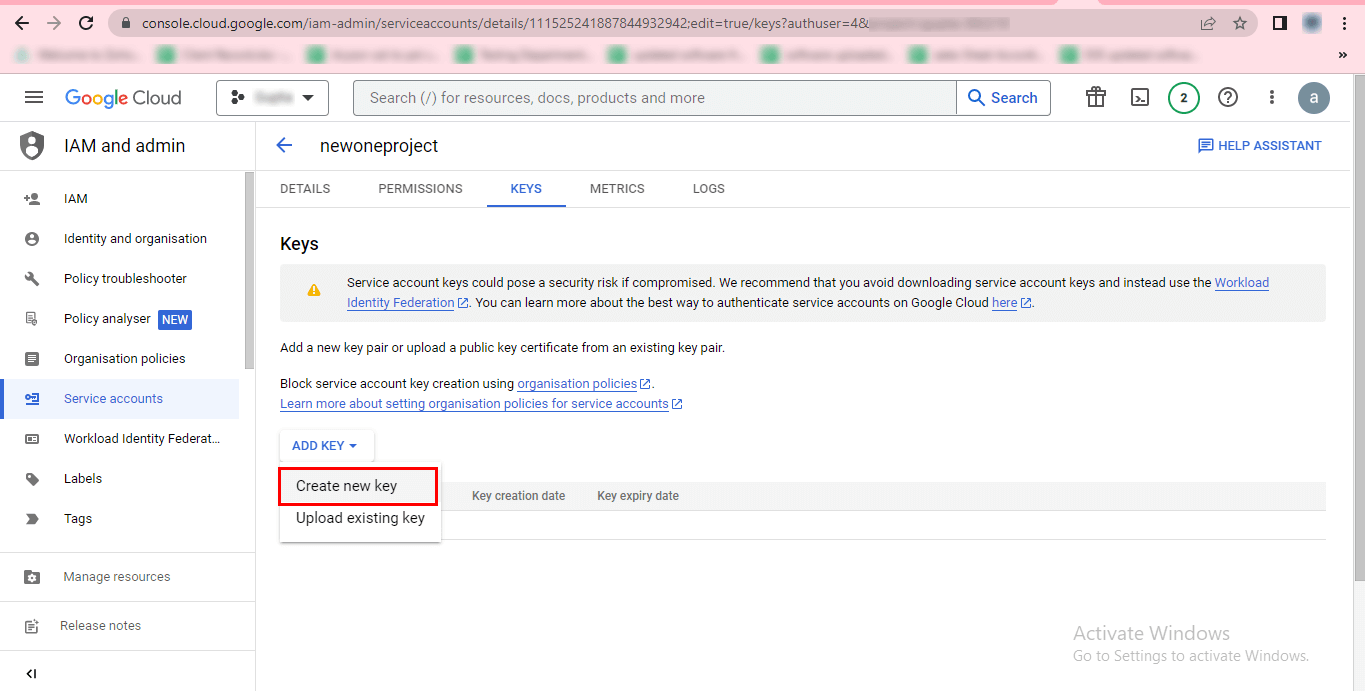
Step-44 In the pop-up window, select P12 as the key type and click on the CREATE button.
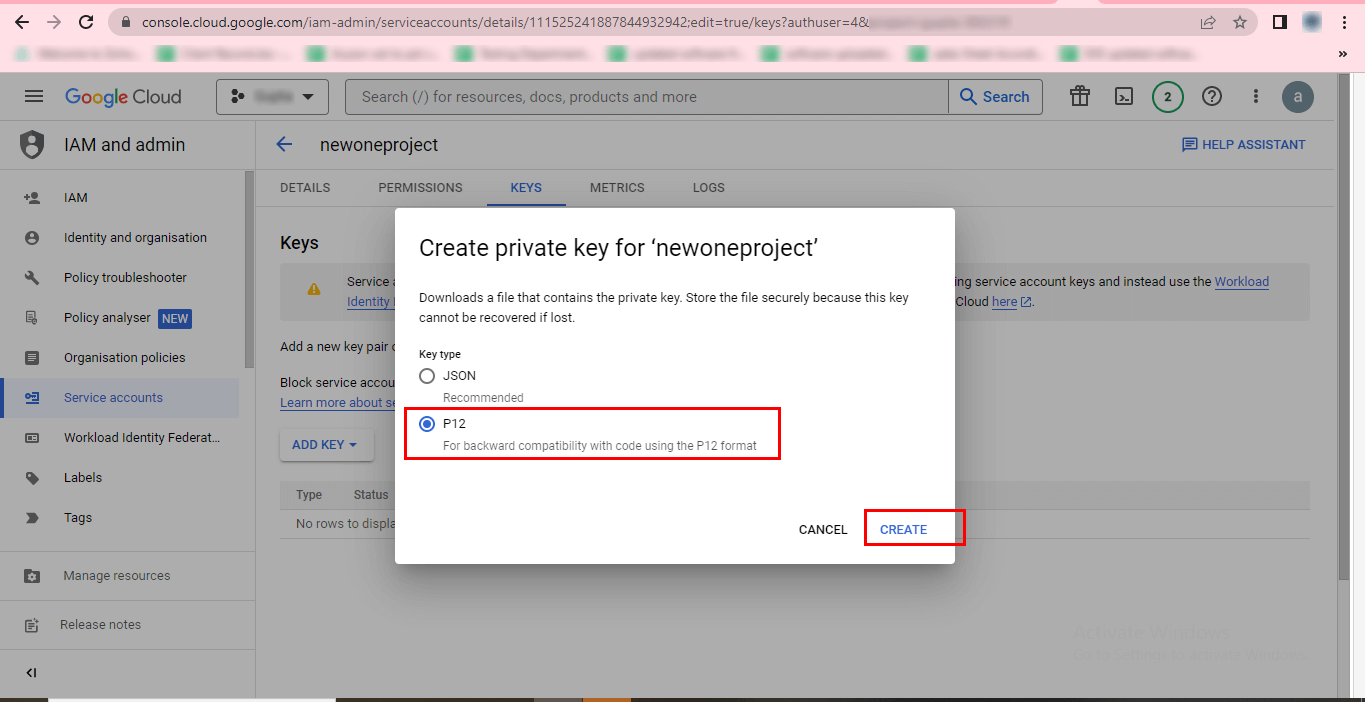
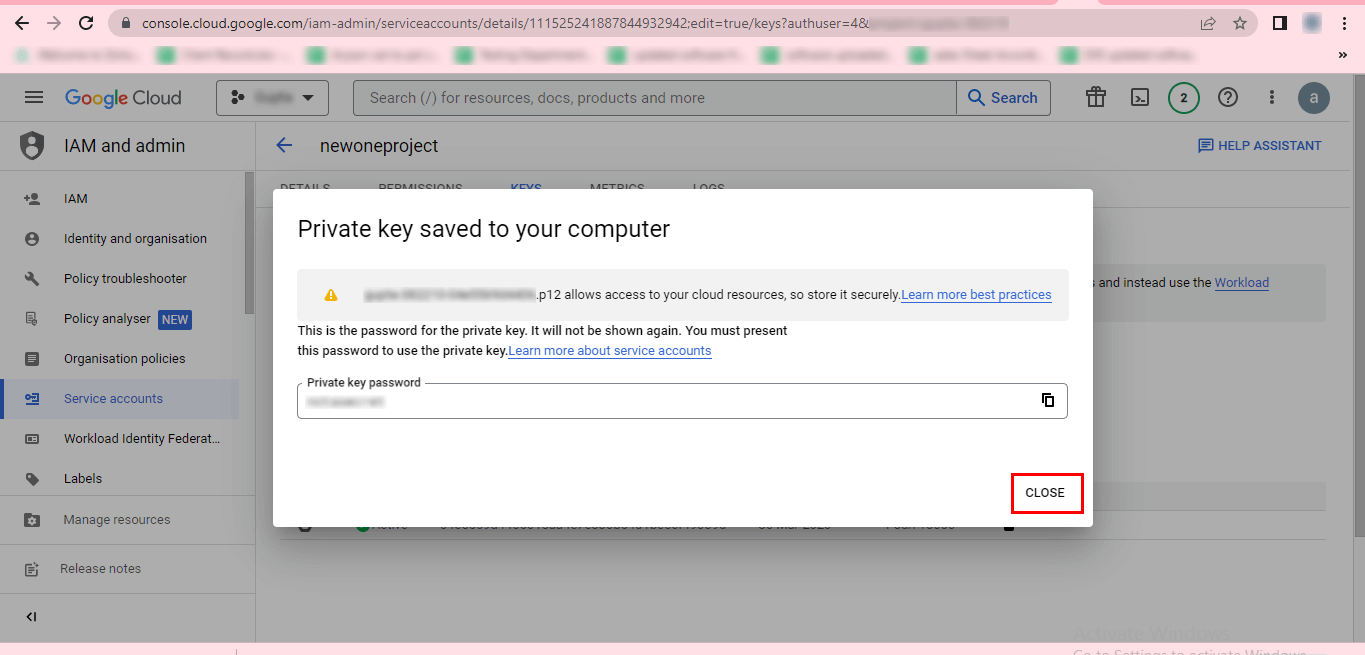
Step-45 Close the pop-up window by clicking CLOSE.
Repeat Steps 1 to 38 as represented above and then proceed with these steps:
Step-39 Tap on the Credentials option in the API and Services page.
Step-40 Next, click the Edit icon at the bottom left in front of your service account ID in the Credentials window.
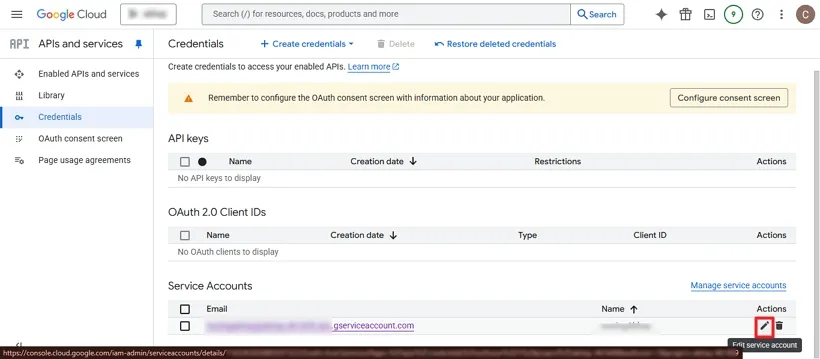
Step-41 Next, press the Keys option from the above tabs and choose Add Key.
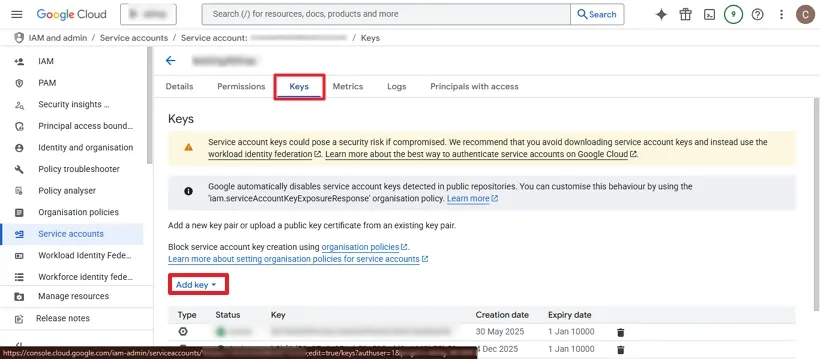
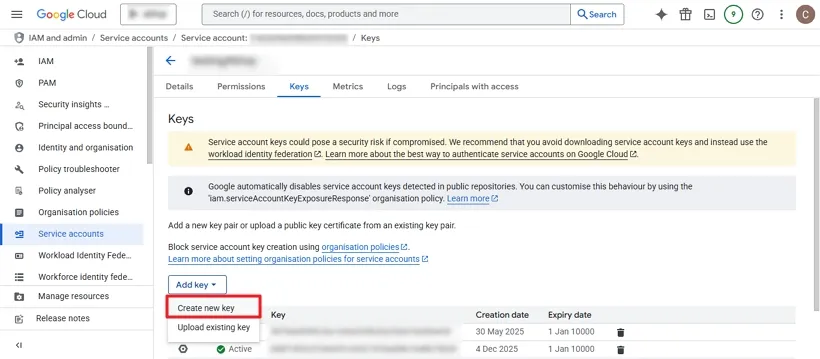
Step-42 Now, click on the Create a New Key button in the displayed options.
Step-43 A dialog box appears. In this Window, select the JSON option and click Create.
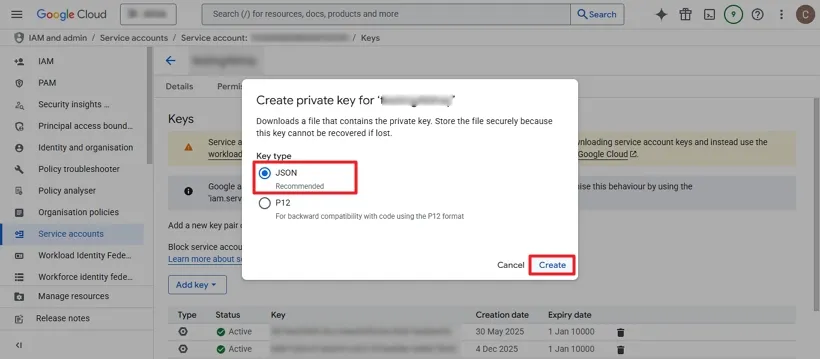
Step-44 At the end, the JSON key will be created successfully. Click on the Close button.
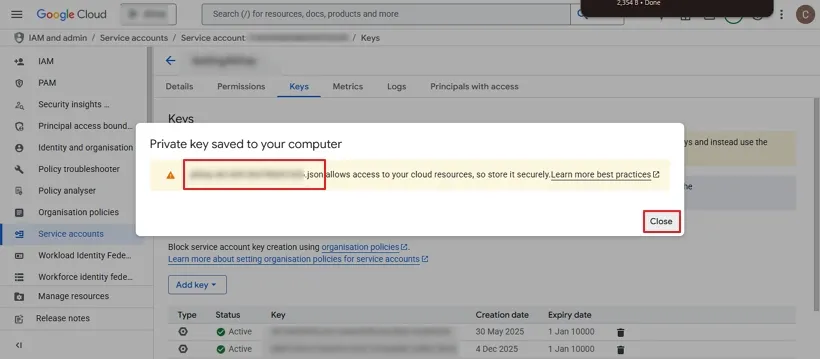
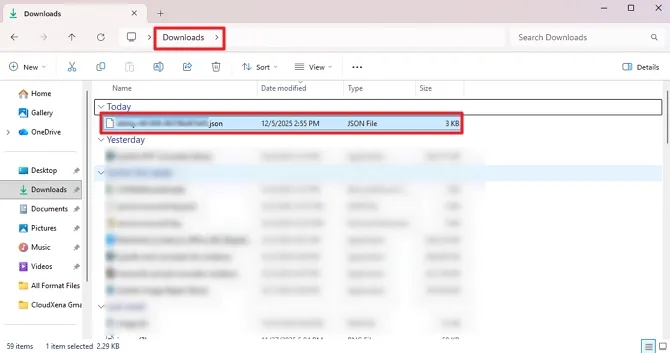
Step-45 The JSON file is automatically downloaded and saved on your local system in the Download folder.
Now that you know how to log into your Google Workspace account, you’re all set to explore its amazing features and services. From collaborating on documents to managing your calendar, everything is just a click away. But remember, it's also important to keep your data safe. That’s where the SysInfo Google Workspace Backup Tool comes in handy. This tool helps you backup your important emails, files, and calendars, ensuring you never lose valuable information.
Related Articles
How to Export Yahoo Mail to PST File Format? How to Migrate Yahoo Mail to Office 365 Account Easily? How to Change Yahoo Email Address? How to Setup Yahoo Mail in Outlook Email Client? How To Export Gmail Emails To PDF? How to Export Yahoo Emails to Computer? How to Save Gmail Emails with Attachments to the Hard Drive?