Users often ask how to export emails from Outlook.com to a USB drive or any other external storage media. But no such relevant blog or article is there to help them. In this blog, we will know how you can back up your email messages from Outlook.com with reliable methods. Also, we will learn about the Hotmail Backup Tool for quickly exporting your Outlook.com emails.
Although desktop email applications are immensely popular these days, some users are still using web-based email services. Outlook.com is one of them and is quite popular with email users. It is the upgraded version of Windows Live Hotmail, a discontinued email service of Microsoft.
The existing Hotmail users can log into Outlook.com by using their old email address, i.e. abc@hotmail.com. But now users cannot create new email accounts with that domain. Instead, they can only create an email address of the @outlook.com domain. However, the email accounts with both domains are supported by Outlook.com.
Sometimes you need to save email messages from Outlook.com on a USB drive or any other media for backup. The other reasons are as follows:
It is a good choice to protect your essential data from any kind of threat or unauthorized access. There are two methods to migrate your emails from Outlook.com. These are the manual method and the professional tool. The detailed step-by-step guide for these methods is discussed below.
You can now safely eject the USB drive from your PC. The above manual solution is very effective but not at all convenient. It will take a lot of time and effort to perform every step manually. In case you have a large number of email messages, it may take several hours. Therefore, look at the automated solution given below.
The SysInfo Hotmail Backup Tool is one of the most recommended solutions to backup emails to the local computer. It is user-friendly and within a few steps, completes the task. Moreover, you don’t require prior technical expertise to use this tool. Unlike the manual solution, it is quick, reliable, and highly efficient. Below are the key features that you get in this software:
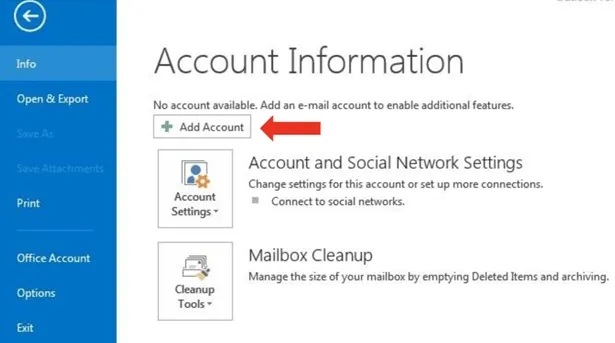
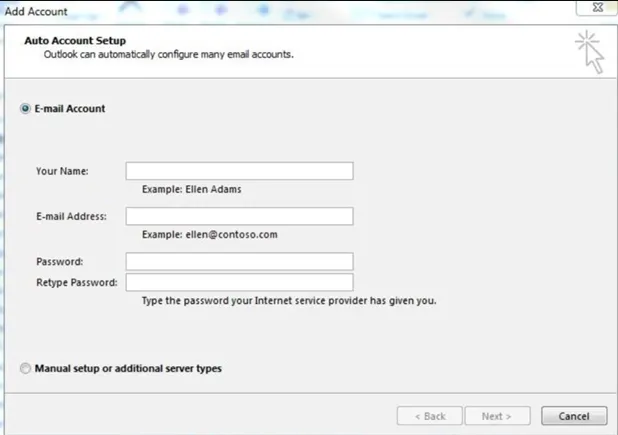
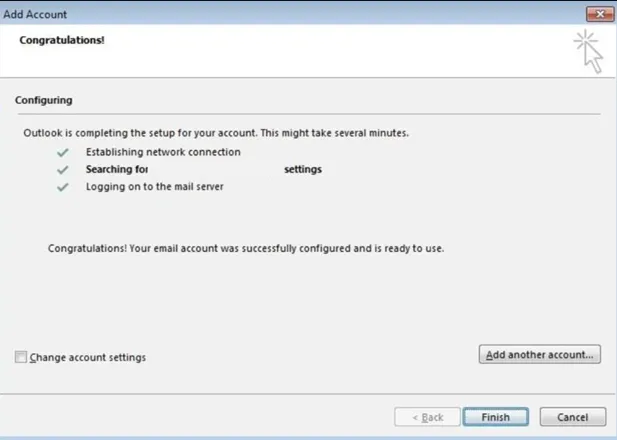
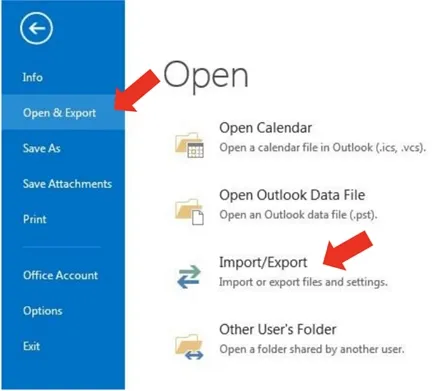
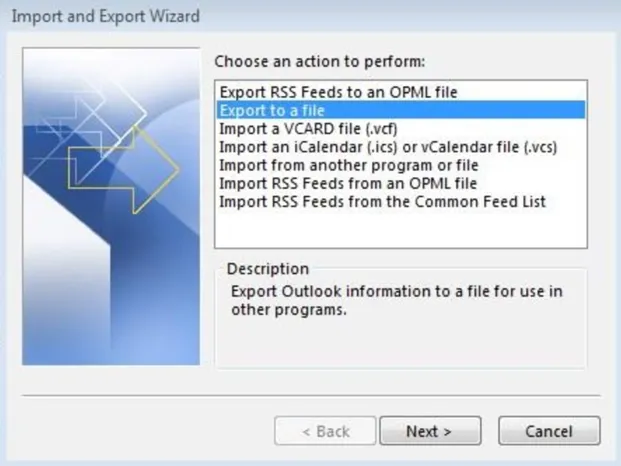
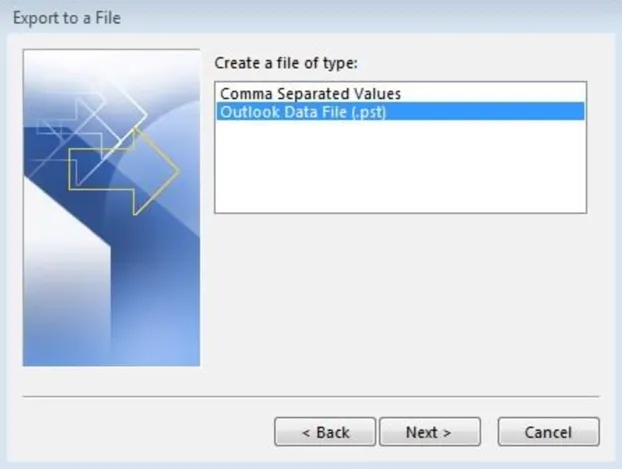
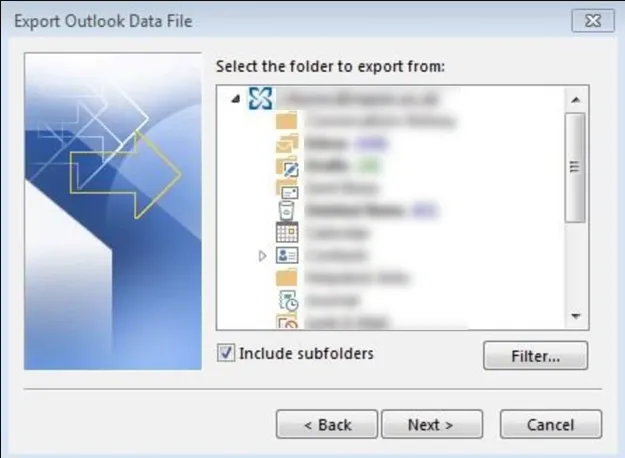
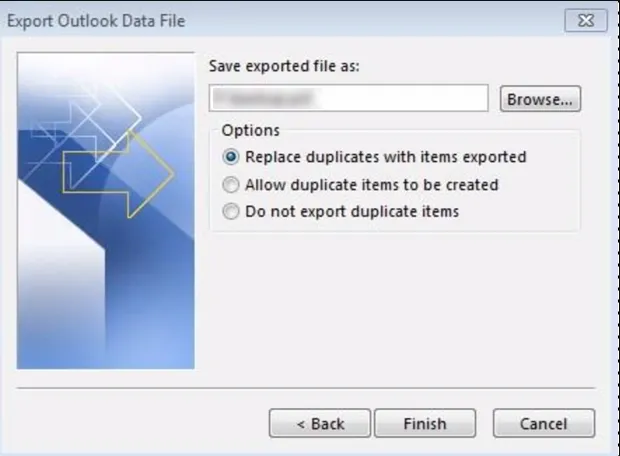
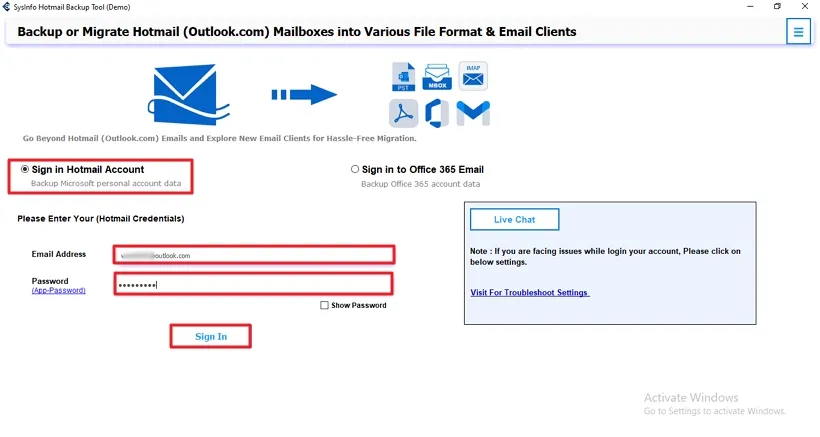
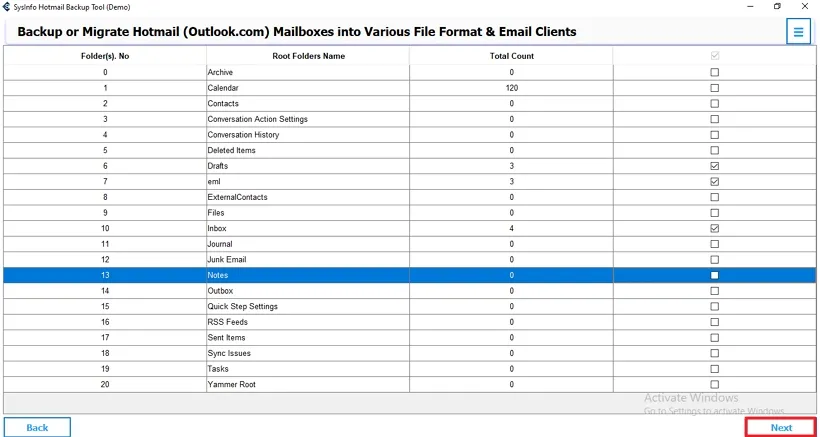
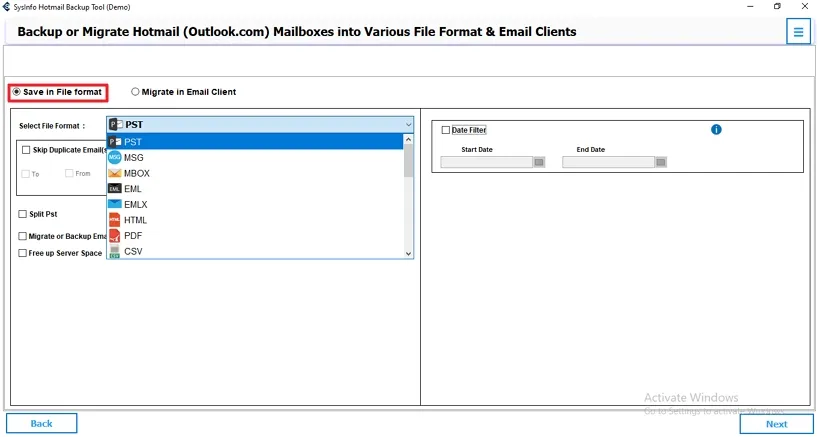
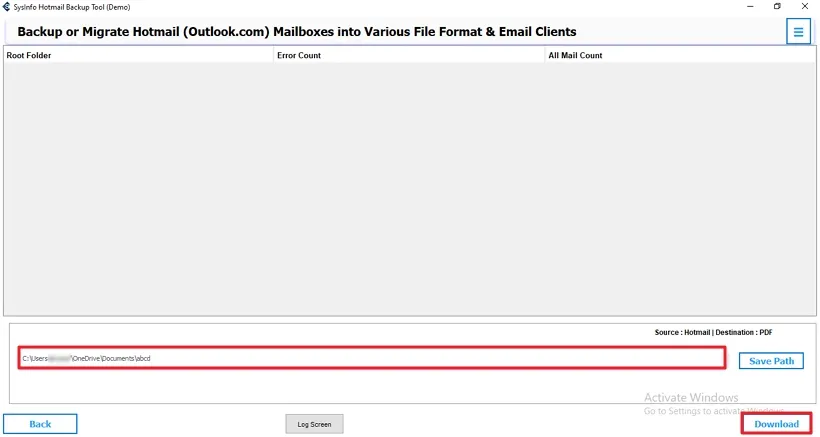
Follow the steps shown below:
This blog clearly explains how to export emails from Outlook.com to a USB drive or any other storage media. We have discussed two different methods i.e. manual and professional. The manual method is good, but it may take a lot of time and effort. Whereas, a professional solution like the Hotmail Backup tool is an advanced way to backup Outlook.com emails securely.
Q1. How can I export mail from Outlook.com to a USB drive?
Ans- To export mail from Outlook.com to a hard drive, you can opt for the manual method. But it will be difficult and tiring. Therefore, it is suggested to use a dedicated tool by following the steps given below:
Related Articles
How to Export Yahoo Mail to PST File Format? How to Migrate Yahoo Mail to Office 365 Account Easily? How to Change Yahoo Email Address? How to Setup Yahoo Mail in Outlook Email Client? How To Export Gmail Emails To PDF? How to Export Yahoo Emails to Computer? How to Save Gmail Emails with Attachments to the Hard Drive?