Windows 10 devices do not boot problems other worldwide users face, which makes it crucial and helpful to have a recovery drive at hand. Do you want to create a recovery drive on your Windows version? If yes, then this blog is useful to you in this concern. You will know the manual solutions for creating a recovery drive in any Windows version. In addition, we will also learn about the Windows Data Recovery Tool in detail. Let’s get started.
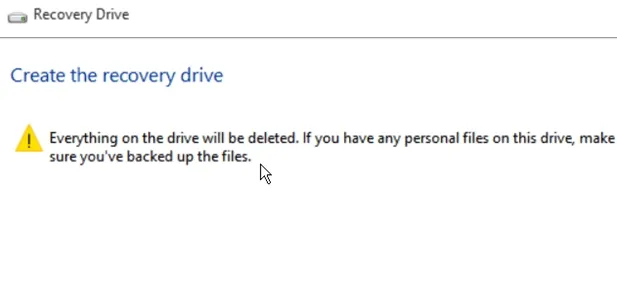
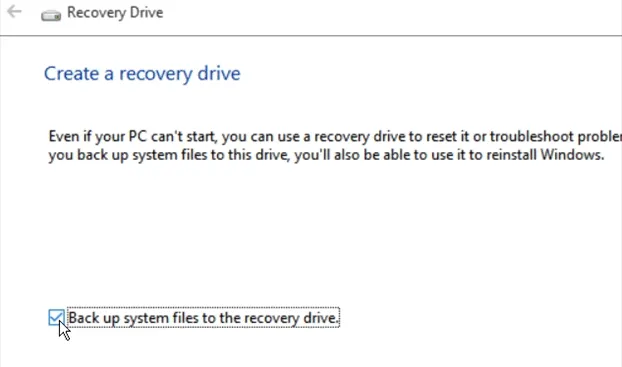
Windows Recovery Drive is a bootable disc that contains advanced recovery options, such as System Restore, Startup Repair, Safe Mode, etc. It fixes system errors and even reinstalls Windows 10 or other OS from startup. You need a USB or hard drive to backup system files during Windows reinstallation. However, there are chances of unexpected data loss, so we need to be careful beforehand and throughout the process. Additionally, remember that the recovery drive isn't a system image. It cannot ensure your files, settings, apps, etc.
A recovery Drive can be beneficial in different tricky situations. Some of the substantial reasons for creating a recovery drive are:
It is best to provide recovery media when facing a catastrophic device failure on a computer. But most of the time, the development condition falls behind the device's boot failure. We, therefore, need to come up with an appropriate solution to create a Windows 10 recovery disk on the system. Below are different manual methods and a professional tool to recover data in case of loss.
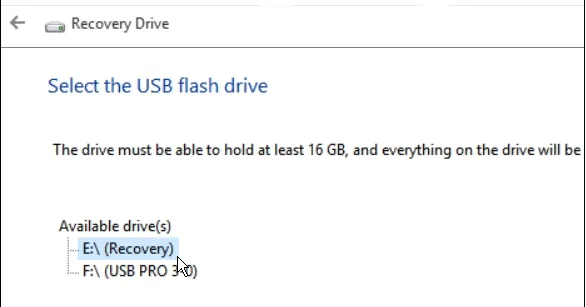
After the process completes, one will observe an alternative ‘Delete the recovery partition from your PC’. It shows if you happen to have a recovery section on your Windows platform. You can tap it to erase the recovery section to free up the memory.
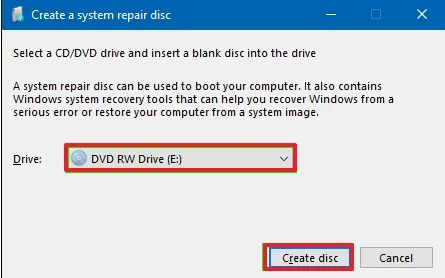
Windows then begins editing the disc immediately. After the process is complete, it gives a piece of information that might be helpful while working on the disc.
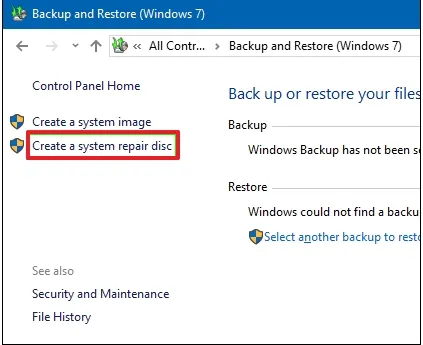
Note: The important thing to remember is that the repair disc is associated with the Windows version. If you have Windows 10 64-bit downloaded on your desktop, then it can help you in repairing the disc.
Usually, an individual does not require any recovery drive or repair disc. If Windows fails to boot normally, then it automatically starts recovery in the third start and loads advanced startup alternatives. This provides the user, a way to open the same resources as a recovery drive. When a PC fails to boot, one can use a flash drive to load Windows 10 on a hard disk.
The above methods will create a recovery drive but there may be chances of corruption in USB drives or hard drives. So, it is advisable to always use a digital solution available in the market. Professionals also suggest going for a tool for secure access of your files. One such solution is discussed below.
The Sysinfo Windows Data Recovery is free software that allows you to recover media from your drives smoothly. It is compatible with different system versions and helps to quickly recover hard disk data after accidental formation. This utility avails some other advanced features that help in receiving precise results. These are:
Steps to Recover Data from Drive for Windows
The above blog states all the perspectives to create a recovery drive. It can sometimes become tricky to find an appropriate solution. So, hereby we provided manual and alternative strategies that will help users to create Windows 10 recovery disk or in other Windows versions also. Moreover, with the suggested professional tool, users can easily recover data without hassle.
Q1. How can I create a Windows recovery drive on Windows 11?
Ans. To create a Windows recovery drive on Windows 11, follow these steps:Related Articles
How to Export Yahoo Mail to PST File Format? How to Migrate Yahoo Mail to Office 365 Account Easily? How to Change Yahoo Email Address? How to Setup Yahoo Mail in Outlook Email Client? How To Export Gmail Emails To PDF? How to Export Yahoo Emails to Computer? How to Save Gmail Emails with Attachments to the Hard Drive?