Many business enterprises nowadays are switching their contemporary on-premise messaging platform to Microsoft Office 365. This article will explain a manual way to migrate Exchange Server to Office 365. In addition, we will discuss an EDB to PST Converter. It provides you with an automated way to export EDB to Office 365. At last, the choice would be yours, either try the free method or the professional solution.
| Exchange Server | MS Office 365 |
|---|---|
| Microsoft Exchange Server is a self-hosted system that manages the mailboxes, contacts, and calendars of different account users. | Microsoft Office 365 is a popular cloud-based platform that contains Microsoft Office tools as well as other useful applications. |
| Many small, medium, and large organizations and email providers use Exchange for home and personal accounts. | Office 365 stores everything on the cloud. So, you can easily access your business data from anywhere on any device at any time. |
| It stores files in EDB (electronic database) format. | It stores files in multiple formats on the cloud. |
Microsoft Office 365 first came into being in 2011. Since then, migrating business emails and other information from Exchange to a cloud-based platform has been the most frequent migration. Below are a few key features of Microsoft Outlook 365:
There are many more such reasons that make Office 365 advantageous over Exchange Server. Now, in the following section, let’s learn more about its methods.
Migrating data from Exchange to Office 365 is a challenging task for Exchange administrators. Although Microsoft Office 365 has Exchange Online, it does not support EDB file format. Therefore, you can neither export the EDB file nor any of its data directly to your Office 365 account. But with the right tools and methods, you can achieve it successfully. Here, we will discuss a manual method and a professional solution to migrate EDB files.
Since this process is a bit lengthy, it is divided into multiple steps. You need to perform every step one by one.
Step 1: Endpoint Creation
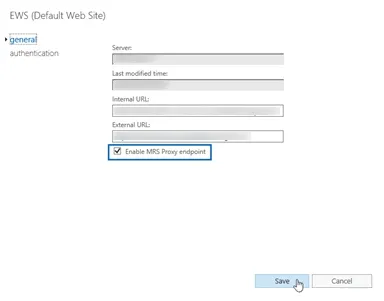
Create an endpoint to establish a connection for the Exchange Server running MRSProxy. It will help you perform remote migration.
Step 2: Enable Proxy Service
Generally, MRSProxy is enabled by default in Exchange Server. But if it is not, follow the steps below:
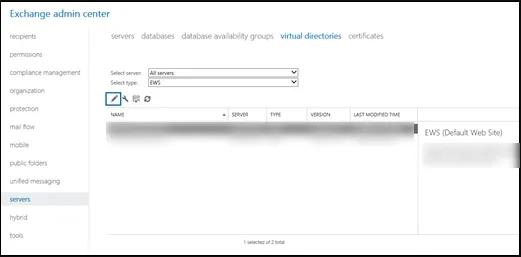
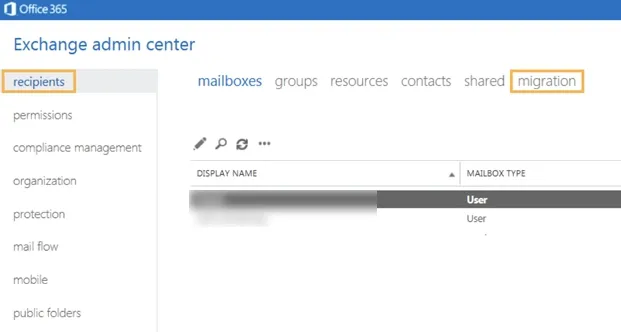
Step 3: Use the Exchange Administration Center (EAC)
The Remote Migration wizard in the Exchange Administration Center allows to move the EDB mailboxes. It will migrate from Exchange Server to Exchange Online and vice versa. Follow these steps:
Step 4: Remove Batches
Step 5: Re-enable Outlook Web App
Re-enable the Outlook Web App (OWA) to get offline access. While migrating the mailboxes from Exchange to an Office 365 account, reset the Offline access setting in the browser. It enables you to use Outlook on the web offline.
Drawbacks of the Exchange Hybrid Migration Method
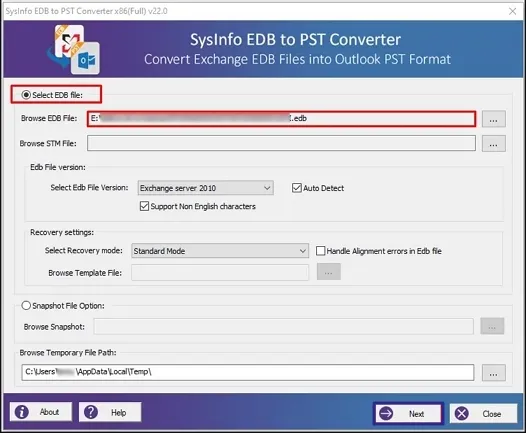
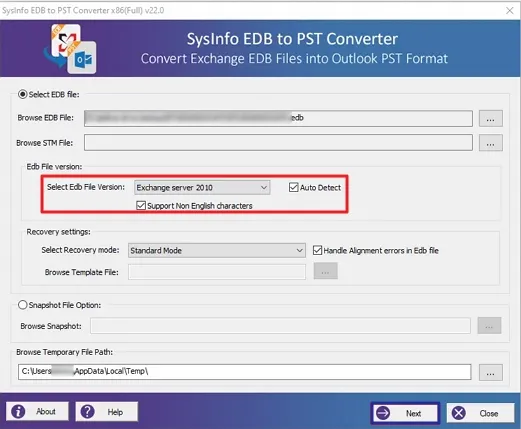
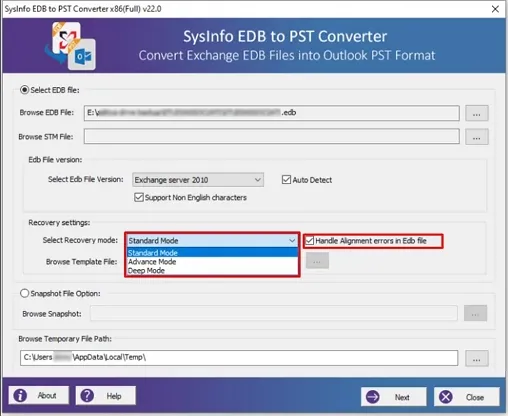
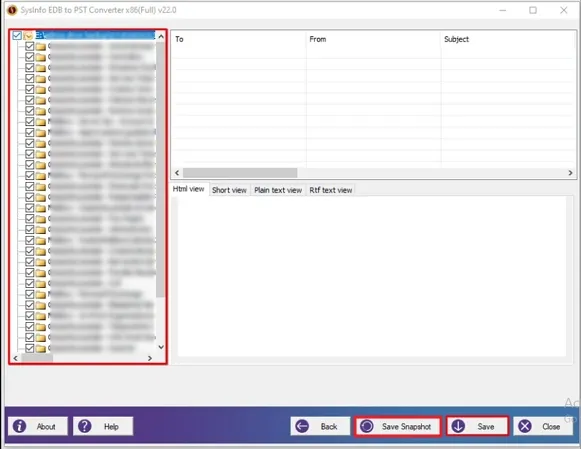
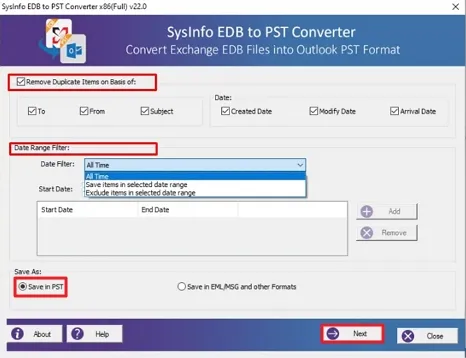
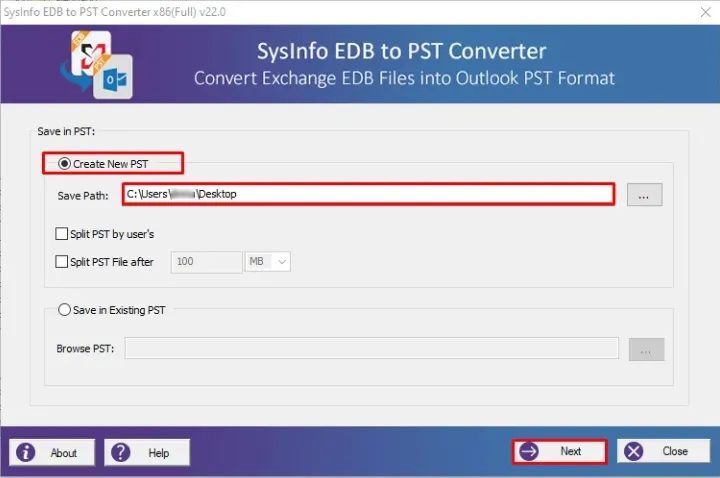
We know that it is difficult to directly migrate EDB files to Office 365. Therefore, we must first convert them to PST for easy access. I recommend you go for an automated solution and try the EDB to PST Converter Tool. It contains an intuitive user interface so any novice user can use this software. It has other features too, that make it unique, such as:

The article has nicely explained how to migrate Exchange Server to Office 365 step-by-step by using different methods. The Hybrid Migration method is a free way that help migrate your mailboxes from Exchange to Office 365. But if you are looking for an easy and automated solution, consider using a professional tool. It is expert-recommended, reliable, and secure. Moreover, finishes the task within no time.
Q1. How do I import EDB to Office 365?
Ans- To do so, we need to convert EDB files to PST. Follow the steps below to import EDB files to Office 365 in just a few steps:
Q2. How can I Import mailboxes from EDB to Office 365 on Windows 11?
Ans- You can try manual methods to import EDB to Office 365 on Windows 11. However, they are complex and take a lot of time. Also, they are not secure enough. Instead, you can use the EDB to PST Converter software for quick and safe import of your mailboxes. It is highly compatible with all system versions, including the latest Windows 11. Furthermore, you can locate, edit, and share EDB files in Outlook easily.
Related Articles
How to Export Yahoo Mail to PST File Format? How to Migrate Yahoo Mail to Office 365 Account Easily? How to Change Yahoo Email Address? How to Setup Yahoo Mail in Outlook Email Client? How To Export Gmail Emails To PDF? How to Export Yahoo Emails to Computer? How to Save Gmail Emails with Attachments to the Hard Drive?